Denver Natural Hair Meet-Up: The Re-Cap

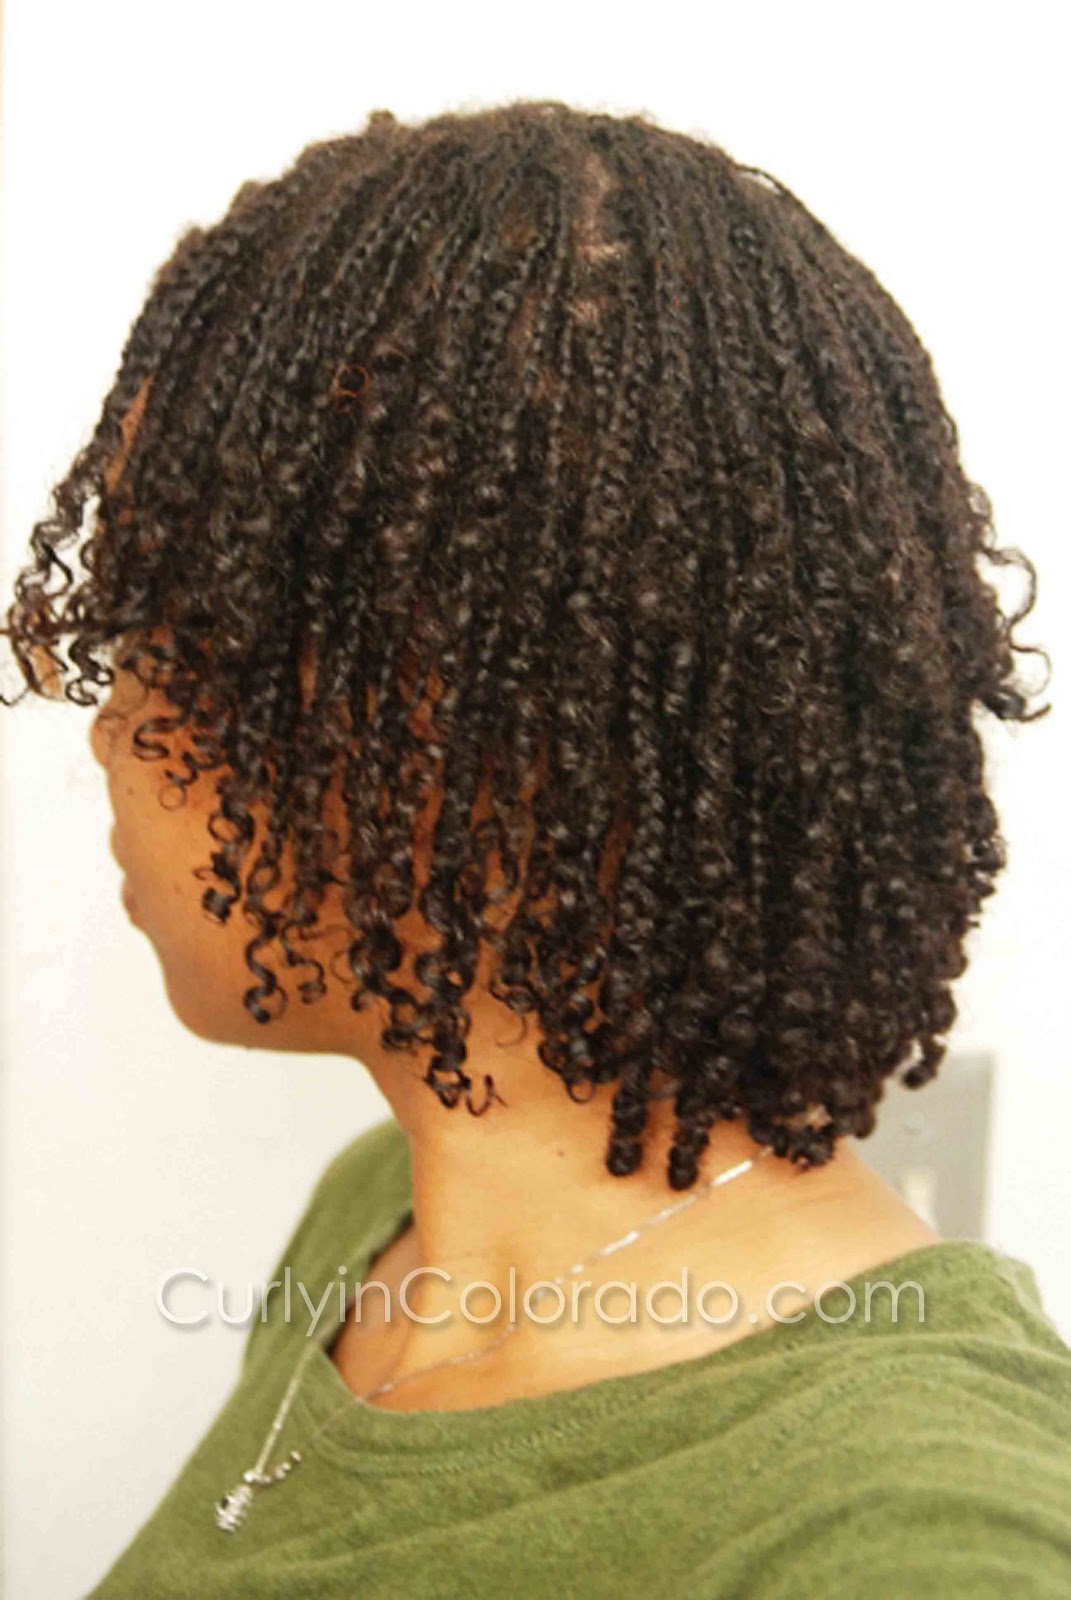
Me and Sabrina Perkins of
SeriouslyNatural.org

I’m winding down and letting my feet rest after all of the days’ activities.  There were plenty of things to do today before the meet-up downtown but we managed to pull it off.  The great thing about all of this is that Sabrina (of SeriouslyNatural.org) and I have lots of ideas for the next event.  Getting ready for tonight was like opening up a whole new world of possibilities.  We met lots of great contacts and found support from places we didn’t know were there. 

The Rio Grande Mexican Grille served up some excellent strawberry margaritas and mexican dishes.   Thanks to the friendly staff who were also very accomodating, we had an enjoyable evening.  A big thanks to everyone who came out to our first event.  It was really great to get a chance to speak with everyone and share our tips and experiences.


Rio Grande Mexican Grille
in Downtown Denver


Hair talk and good food


Me with Shanae Smith and Ayanna Blueford
Loved talking with you ladies


Goodie bags with free samples
Thanks to all of the businesses that offered items for our gift bags including:  
Kinky Curly
Curlformers
Sephora Shops at Cherry Creek Mall and Northlands


Giveaway Prizes

(Carol’s Daughter & Ojon Samples) More Than Curly Salon in Aurora (Ouidad Samples)


We look forward to doing it all again in the future so be sure to email either Sabrina or myself if you would like to receive info on upcoming events.


Heat Damage Again. . .Really?

If you watch my channel, mitchellzee, on YouTube, then you probably already know about the heat damage I have in the front section of my hair.  When I do a wash n’ go, I just braid that part up to give it enough texture to blend it with the rest of my hair.  My hair just seems to be really fine in front so even after using 3 different types of heat protection every time I flat iron, I still end up with straight pieces. 

My hair after washing and deep conditioning
No curls; just a mess
So, I was pretty upset when I found even more heat damage after the last time I wore it straight for Easter.  I knew it wasn’t the initial press but a touch-up later in the week that did it. 
My rules for avoiding heat damage are as follows:

1.  Always cleanse the hair thouroughly prior to using heat
2.  Do a moisturizing deep conditioning treatment before and after the use of heat
3.  Always use heat protectant
4.  No more heat styling the rest of the time (i.e. styling by wrapping, roller setting, bantu knots and braids instead of using the flat iron again)

The first time I gave myself heat damage I broke rules #1 and #3.  I thought that I could get away with using heat after a braidout left my hair nice and soft.  I thought, “Wouldn’t it be cool if I could just straighten it now without the blowdrying?”  Well, yes and no.  You can use braids to stretch your hair prior to straightening as long as you don’t use any oils which can cause damage when you apply direct heat.  I used a mixture of castor, coconut and olive oils to do the braidout so when I applied the heat….sizzzle!  Also, I didn’t even bother with heat protectant and ended up with a piece in front that not only did not revert back, but was straight like relaxed hair.  I eventually cut it off which is why I now have bangs.  This was 3 months after I did the big chop.

This time, however, was a huge dissapointment because I KNEW better!  I broke my own rule #4; no more heat the rest of the time I wear it straight.  I moisturized my hair and sealed it with coconut oil everyday so I knew for sure this had something to do with the new damage I noticed.  Not only that, I oiled my scalp with Wild Growth Oil and it ended up coating my strands from root to tip.  I could have used my Caruso Rollers, to style my hair but was pressed for time and pulled out the flat iron again.  After shampooing and deep conditioning, my poor hair was a hot mess!  I didn’t have curls just a shrunken puff ball (see picture above).  The damage looked like it was pretty serious and I was really scared that I wouldn’t see my curls again.

Find out how I got my curls back in my next post “Recovering from Heat Damage”

Recovering from Heat Damage

After my most recent bout with heat damage, I wasn’t too sure how to go about getting my curls back.  I wore my hair straight for Easter Sunday but decided to use the flat iron again later in the week after using oils in my hair.  My curls did not revert back like they normally did when I wore my hair straight and I was afraid that the damage was permanent.  Was I upset?  You damn skippy I was!  I couldn’t believe that I let this happen again.  Not only that, I just chopped off 1/2″ of damage at the start of the year which gave me curls galore.  Now I was right back where I started and worse.


What did I do you ask?  Well, I did what I always do when I need answers, I went to the internet.  I was pretty certain that what I was experiencing was permanent heat damage but I was really hoping that someone out there had a magic remedy.  I stumbled onto a YouTube video that I remembered watching by Taren916, where she used the Aphogee 2 step Protein Treatment to help repair her heat damage.  She showed a before shot where her hair was limp and not so curly and another after the treatment when her hair had more texture. 

After watching that, I went to the hair forums and read articles for more info on how the protein treatment worked.  Basically, heat can cause significant damage to the cuticle layer of the hair strand.  This is the protective outer layer (imagine tiny shingles that overlap one another).  Once these cuticles are damaged, the hair is vulnerable and more prone to dryness and breakage.  The protein in the Aphogee treatment helps to fill in the gaps where the hair strand is missing these important little pieces. 

So, the very next day, I shot over to Sally’s and made a B-line for the Aphogee products.  I still wasn’t too sure if this was all I needed so I grabbed a silicone based conditioner (the GVP version of Paul Mitchell’s The Detangler) and said a prayer.  After the application and rinsing it all out, I was very surprised to see curls where there was once very non-descript strands.  The treatment actually worked, but the curls were still looser than before (as you can see from the photo).  My hair was still much thicker at the roots.  Afterwards, I decided to go back to an old regimen I employed when I used to use semi-permanent color on my natural hair. 
Damaged hair regimen:
  • Deep condition 2x per week- 1x with moisture; 1x with protein
  • Stay away from heat…lol
  • Protective styles to avoid further damage
  • My curls 4 weeks after the treatment.
    Using braids to protect hair from too
    much manipulation
  • Silicone based conditioner for detangling and co-washing
I added the silicone conditioner because the primary reason for using silicone in hair products is so that it can help mask damage incurred by heat styling, hair color and chemical treatments.   Thankfully, my hair is back to being nice and curly but is just a bit more stretched than before with a few lazy curls here and there.  Some people use heat for this effect but that was never my intention.  Needless to say, me and my curls are stepping away from the heat for a good, long while.

Shea Moisture Products at Walgreens


Shea Moisture Products
Now available at Walgreens stores


All the hair forums and blogs are buzzing about the Shea Moisture line which is now available at Walgreens stores.  The drugstore chain is doing a BOGO this week on all of the items in the line so if you’ve been thinking about trying it out, now is the time! 
Prior to this, the Shea Moisture line was only available at Target stores or online at Target.com.  The products are made with natural and organic ingredients and are very affordable with each item going for $9.99 USD. 


Shea Moisture’s
Dandruff & Dry Scalp Elixir


Even with all of the excitement on this promotion, I still wasn’t too sure that the Walgreens in my area would have the Shea Moisture line stocked yet.  So tonight I decided to stroll by the hair aisle just to check and see if they had it.  There wasn’t any Shea Moisture to be found.  I figured that maybe this Walgreens was a little bit late but then I stopped by the new items near the door and found a very small display with maybe five items from the line.  There were only one or two of each item.  I’m hoping that there will be some Curl Enhancing Smoothie left when I get around to shopping this Friday.  I already told my husband that I’m gearin’ up for a product haul this week so look out Walgreens, I’m comin’!

Night Time Routine for the Corkscrew Braidout


The Corkscrew Braidout


I recently posted a video showing how I do my Corkscrew Braidout.  I call it this because of the way I roll the ends of each braid so that it makes a smooth spiral. 
The look is great for special occasions or when I just want big, curly hair.  To date, I have been able to keep the look going for about three days before it starts to look a little less than cute. 
I “Pineapple” the
Curls on top of my
head

I do the pineapple method by pushing the curls up on top of my head and wrapping it up with my satin scarf and bonnet. 

First, I push all of my hair upwards and then use bobby pins to keep it pulled back off of my face and up in the back. 

Then I use a loose band to put all of my hair in so it stays up.  After the hair is up, I fold a square satin scarf in half to make a triangle and use that to wrap around the
 sides so they don’t get fuzzy. 


I protect the look
 with a satin bonnet


Finally, I put my satin bonnet on over the whole thing to protect the curls at the top and that’s it.

I like the lightweight feel of this style so I just use a tiny bit of coconut oil each night before I wrap it up.  When the look starts to get old, I either co-wash or just pull it back into a bun for another day or so.