Natural Hair Style–The Corkscrew Braidout

I’m finally all finished with my Corkscrew Braidout video. When I blogged about this style a few months ago, I realized that the process may be easier for other naturals to follow if I just illustrated it in a video on my channel. This has become my go-to style for special occasions because I don’t have to use any heat to get a fluffy, curly look. The other reason why I wanted to get this tutorial up is because I noticed that there aren’t that many videos on natural hair styles that use setting lotion as the main holding product. I never thought to use it for a braidout but it works great while leaving the hair soft and lightweight. I’m just glad to have finally found a braidout method that is pretty much fool proof and delivers every time.


See more of my videos on my channel “mitchellzee” on Youtube.com

Back to Basics: The Apple Cider Vinegar Rinse

I was never really a big fan of doing Apple Cider Vinegar Rinses when I started out on my natural journey.  I kept reading how it worked as a clarifier.  I even watched (and understood) KimmayTube’s videos on pH Balance and knew how it worked to close the hair cuticle.  Still, no matter how many times I tried, it just didn’t seem to do anything for my hair.  Then I found out about the Organic Apple Cider Vinegar by Bragg’s.  I thought maybe that would make a difference but it still seemed like nothing was happening.

My hair after an Apple Cider Vinegar Rinse
(detangled with the Denman Brush)
Recently, I decided to get “back to basics” and start washing my hair more often.  I don’t want to use shampoo everytime so I sometimes co-wash and then follow that with a vinegar rinse.  At first, I kept getting the same blah response.  Finally, by accident I think, I poured more vinegar into the container than usual.  Then, I filled it the rest of the way with water from the shower head like I always do.  I could tell right away that something was different.  I could feel the conditioner slipping down my strands.  It was actually removing all of the extra and giving me a clean feeling without leaving my hair stripped.  I left it in for a few minutes before doing a lukewarm rinse.  When I got out, I noticed how soft and fluffy my hair felt. 

I honestly couldn’t believe how good my hair looked.  I didn’t even want to put anything else in it because I was afraid to mess it up.  Now, whenever I do an Apple Cider Vinegar Rinse, I always make sure that I’m using enough vinegar.  I always eyeball it but I would say it’s at least a 1/4 cup (at the bottom of a tall water bottle) and then I fill it to the top with regular water.  I’m so glad I decided to try it again.  It definitely works for me…finally.

New Year, New Trim


My new Stainless Steel Sheers by Conair
I was looking at my hair for the past few months and noticing that my curl pattern had gotten looser.  I knew that henna can have this effect so I added amla powder to my last few applications to prevent this from happening any further.  After wearing my hair straight twice in December, I was pretty sure that I was experiencing some heat damage.  My hair texture is thinner in the front so it always happens there first.  The rest of my hair was still curly but not as thick as before.  After using my Aubrey Organics GPB conditioner for a couple of light protein treatments, I knew that my hair, although it looked better, still needed a trim. 


My stretched hair just before
trimming the first section


I was due for a trim this month anyway so I figured why not invest in some new sheers.  I bought the stainless steel hair sheers by Conair.  I was surprised to find them in a kit that also came with a cape…COOL!  Instead of flat ironing my hair again, I decided to do the trim on stretched hair.  This method showed me that it is possible to do a trim without using heat.  I decided to go for it and take off a little more than the usual 1/8″ to 1/4″.  I cut a full 1/2″ off of each section!  That is a whole months’ growth for me but it was definitely worth it. 
Front View
Thicker, Curlier Hair with Shape
The result…MY CURLS ARE BACK!  I’m so excited because my hair has not been this thick and curly for so long.  The bangs are still pretty loose but I’m okay with that.  The other thing that decided to join the party is my crazy shrinkage.  My hair looks really short since the trim even though it’s still past my shoulders in the back.  This is exciting because I didn’t actually have to cut very much in order to get back where I wanted to be.  I’m still serious about achieving great lengths with my hair this year.  Now, with the trim, I have the healthy ends I need to start things off right.  


Back View
Looks short but it’s still
past shoulder length


Review: Tresemme Naturals Conditioner w/ Aloe Vera and Avocado


Tresemme Naturals Conditioner
in Aloe and Avocado


I’m constantly on the look out for good conditioners that are budget friendly.  Since I co-wash, deep condition and detangle my hair on a weekly basis, I end up going through a lot of conditoner.  Thing is, it also has to be something that my husband feels comfortable using as well.  Let’s face it, his hair is way longer than mine and he is just as concerned about his tresses as I am (well maybe not that much).  This rules out anything that will leave him smelling like pina colada when he leaves the house.  We’re also picky about the ingredients so, no silicones. 
I was glad to find that Tresemme has a new Naturals line where the conditioners are silicone free.  Now, don’t get me wrong, I’m not afraid to use silicones.  I just prefer to co-wash with something that is silicone free for a nice clean rinse that doesn’t leave anything behind.  I picked up a 25 oz. bottle of the Tresemme Naturals Aloe Vera and Avocado conditioner for just under $5 USD.  I was surprised to see that it had a thick and creamy texture; not watery.  This has proven to work really well as creamy base for my moisturizing deep conditioning treatments.   It has a mellow citrus scent that doesn’t offend (I’m sensitive to scents that are overpowering).  Co-washing with it is similar to using a VO5 Moisture Milks in that I can feel it defining my curls while adding slip to each strand.  I would say that detangling with it is about what you would expect from any conditioner in this price range (i.e. Aussie Moist, Sauve Naturals etc.) 

Overall, I consider this an excellent value for the amount of product you get.  The fact that it doesn’t have a bad reaction when I use it as a leave-in under Eco Styler gel has put this on my staples list.  The Naturals line can be found at Target, Walgreens and Walmart.  We are currently workin’ on our second bottle of the Aloe and Avocado conditioner.  It’s a winner in my opinion and is definitely worth a try.

Choosing a Ceramic Flat Iron

My FHI Ceramic Flat Iron
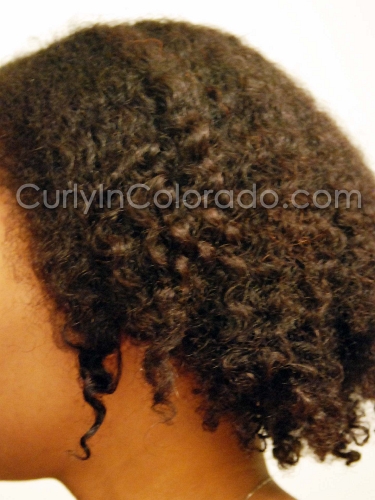
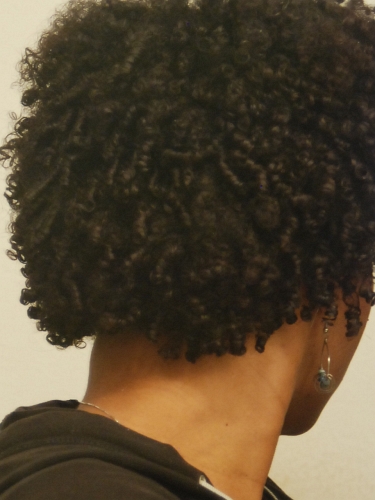
When my first flat iron quit working after only one year of use, I decided that I would definitely look into buying something of better quality the next go ’round.  Little did I know that it would be 7 months before I would finally purchase a new one.  Instead of running out and replacing it right away, I decided to take my time and do some research.  One of the first things I did was start looking into styling options that didn’t require the use of heat.  This started me on my Natural Hair journey which meant that the flat iron of my dreams would have to be able to straighten my natural hair texture, kinks and all.
I looked at Consumer Reports on the subject and found tons of info on the different types of flat irons.  There are a lot of heat styling tools that are ceramic now but the real question is, how ceramic are they?  It turns out that my previous joke of a flat iron was only ceramic coated which would explain the $40 USD price tag.  The material started peeling and would catch my hair.  This exposed the metal plates underneath and caused lots of breakage.  However, professional tools that used full ceramic plates were priced way more than I could afford and were very fragile.  One drop and crack goes the flat iron.  I later read that the mid-range variety ($80-$150) used plates that have multiple layers of ceramic coating and sometimes even added tourmaline. 

 It is the tourmaline that helps the iron produce more negative ions.  No, this is not chemistry class folks, we’re talkin’ hair here!  Apparently the more negative ions the better the heat.  Of course, using direct heat on the hair is never considered a good thing but I found out that there are different types of heat.  This information explained how some flat irons give excellent results and also cause less damage while others burn the hair to a crisp.

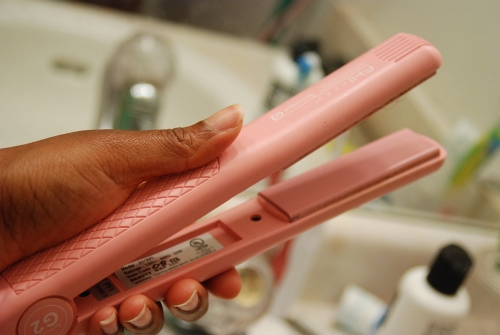
Of all the brands out there I finally narrowed it down to the FHI Technique G2.  I found the pink version on sale at Ulta for $79 but still see it at Target for ten dollars more.  It definitely puts my old iron to shame but the sucker gets hot so I have to be extremely careful with it.  I like that it has a beveled edge which makes it really easy to do flips and curls.  If I could do it all over again I would hold out for the FHI Platform which has a dial so you can adjust the heat setting.  Maybe one day…a girl can dream, right?  

**Check out this article for more info on choosing a quality Flat Iron**