Updated Hair Regimen and Products List

I was looking through my blog the other day and noticed that I still had my old regimen from Fall of 2010 up.  There were lots of products listed that I haven’t used in ages so I figured it was time to update it.  Here is my current regimen and products list.  I may make some changes (I always do) but this is what is working for me right now.

NOTE: where products are bulleted I just use one of the items listed

Pre-Cleanse

I part my hair in 4 sections and apply conditioner prior to cleansing with shampoo or conditioner.  This helps to stretch out my shrunken hair and remove any shed hairs.  This step also helps with detangling.

Shampoo-1-2 times per week
  • Elasta QP Creme Conditioning Shampoo 
  • TheraNeem Naturals Moisture Therapy Shampoo (sulfate free)
  • KeraCare Dry & Itchy Scalp Anti-Dandruff Moisturizing Shampoo
  • Neutrogena Triple Moisture Cream Lather Shampoo
Co-wash-1-2 times per week
  • Suave Naturals Coconut Conditioner
  • Tresemme Naturals Nourishing Moisture Conditioner
Rinses-After Shampoo
  • Oil Rinse-I use grapeseed, olive or coconut oil.  I sometimes do this in place of deep conditioning.  This step also helps with detangling.
  • Apple Cider Vinegar Rinse (ACV)-I do this step after using shampoo to help my hair get back to a normal pH.  I either do the rinse before or after applying conditioner
Detangling Method
I detangle while my hair is soaking wet and saturated with conditioner.  The hair is parted in four sections.  I start by finger combing and then use a denman brush on each section.  I do this 2-3 times per week when wearing wash n’ go’s or once per week if wearing stretched styles.

Deep Conditioning Treatments* 1x per week 
  • Hot Oil Treatment with Coconut, Olive or Grapeseed Oils
  • Tresemme Naturals Nourishing Moisture conditioner with Honey or Olive Oil added
 *I do most of my treatments under a hooded dryer for 40 minutes

Moisturizers*

  • Extra Virgin Coconut Oil
  • Aloe & Veg. Glycerin Spray (homemade)
  • Paul Mitchell “The Conditioner” Leave-in
  • Garnier Fructis Leave-in (for heat styling)
  • Hollywood Beauty Olive Creme
To Seal Ends*
  • Coconut Oil mixed with Castor Oil
  • Olive Oil
  • Shea Butter
  • Grapeseed Oil
*I apply Leave-in conditioner after each wash for moisture.  After that I moisturize when needed.

Curl Definers
  •  Eco Gels-The Pink version and Argan Oil (red)
  • Kinky Curly Curling Custard
  • Curls Unleashed Take Command Curl Defining Creme (trial)

*I always use my Paul Mitchell The Conditioner Leave-in under a curl definer for added softnes and moisture


Styling*

Roller Sets, Curly Braidouts,  Wash n Go’s, Puffs, Buns, Banded Ponytails, Flat Twists, French Braids
*Currently taking a long break from heat styling
Henna-Once every 3 months
I have started doing the 2 step Henna/Indigo process which gives me a natural black tone  


What I add to my Henna mix

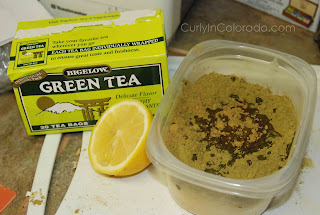
  • Green Tea and Water (enough to make it the right consistency)
  • Olive Oil (usually add this right before application)
  • Lemon Juice (when I want more color)

    I sometimes add powder to darken the hair and maintain curls.  For my Indigo mix I only add water and a little salt.  For each step (henna & indigo) I make sure to co-wash after rinsing out.  This helps to keep the hair soft.

    Henna and Indigo Results

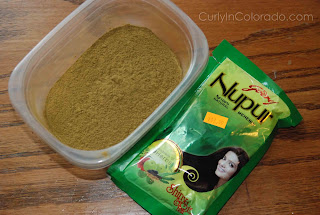
    I finally got around to ordering my indigo so that I could cover my burgundy hair color with something a little more modest.  I’m sure the bright red henna’d hair I had before is appealing to some but it was not my cup of tea.  I wasn’t quite ready for the lengthy two step process where you henna first, rinse out and then apply indigo for a jet black result.  Instead, I mixed one package of Godrej Nupur Henna (50g) with 100 grams indigo.  I ordered the indigo powder from Butters-n-Bars.com which is the same online store where I get my raw unrefined shea butter.

    I kept the henna mix pretty simple as always and just mixed it with a mug of strong green tea to help the dye release.  I added enough water to give the mixture a smooth, almost pancake batter consistency and let it sit overnight.  The next day, when I was ready to apply it, I mixed the indigo into a paste with just plain water and added it to the henna.  I don’t add oils anymore because I read that it can slow the dyeing process.  I applied the “Hendigo” to my hair like a clay mask and covered with plastic wrap.  Then I waited for four hours before rinsing and then co-washing several times to get it all out of my hair.

    The application took very well to the majority of my hair but left my grey strands with just a tinge of color.  I’m planning on doing another application to the roots and grey hairs sometime this week ’cause I don’t need everybody knowin’ how old I’m getting.  If my greys are still too obvious afterward I may reconsider dyeing my hair all black with the two step process.

    My stubborn grey strands are still noticeable 
    I like the reddish brown tone in the sun

    Clairol Semi-Permanent Color Rinse Results

    Applied the color rinse
    in sections to damp hair
    In my last post I talked about doing a Dark Brown color rinse on my hair to help tone down the burgundy red tones from using Henna.  Unfortunately, I have not had much luck with the Beautiful Collection product by Clairol.  I don’t think it’s the product itself but my regimen that does not work with color rinsing. 

    The first thing I didn’t like is that I had to apply the product all over whereas with something more permanent you’re just re-touching the roots after the first application.  I just figured I would start with this to see if I liked the color on me.  The other thing is that the product rinses out easily with conditioner. 

    See what had happened was. . . Prior to applying the rinse, I decided to shampoo my hair so that it was free from any build-up.  Then I applied the rinse and left it on for the suggested amount of time 25 minutes (10 minutes of that was under the dryer).  I rinsed until the water ran clear and then did a deep conditioning treatment which sent me back under the dryer.  I think this is where I went wrong.  When I rinsed the conditioner out in the shower I saw a lot of the color rinsing out with it.  I followed up with an ACV rinse to close down the cuticles of my hair strands and towel dried.  I was planning on wearing my hair straight so I let it air dry overnight and flat ironed the next day.  When I went out into the sun…STILL BURGUNDY!  I was up all night doing my hair and the color didn’t even take but like I said, the deep conditioning with heat is probably what did it.  I thought that maybe the hair cuticle opened up because of the heat from the hooded dryer and the color released.
    My hair color the next day…still burgundy
     

    I figured I would try one more time a few weeks later and this time just rinse the color out, apply conditioner in the shower, detangle and leave it at that.  I mean, I know Clairol doesn’t think I can shampoo, apply a color rinse and not use conditioner to get my hair back in order do they?  Well, apparently I’m the crazy one because the color (after detangling and rinsing the conditioner out with cool water) came out again! 

    The product in question
    Clairol Beautiful Collection
    Semi Permanent Color Rinse
    in Darkest Brown

    Part of me keeps thinking back to when I told my mom about adding deep conditioning treatments to her routine.  The semi-permanent color rinse by Clairol is the very reason why she wouldn’t (or couldn’t).  She explained to me that the color kept rinsing out when she tried to deep condition so she stopped…Hmmmm.  Well, anyway I can see now that I’m going to end up going with something more permanent next go ’round.  Maybe the 2 step Henna/Indigo is the right choice for me after all.  To be continued.

    Semi Permanent Color Over Henna


    burgundy hair color after using henna
    My burgundy hair after using henna


    As you can see from the title, I have finally decided that I’m going to attempt to cover my currently burgundy hair with a Semi-Permanent rinse.  When I started using henna I mixed it with Indigo in order to get a brunette effect.  I was never really successful but continued to use henna each month for the past year or so.  Although, I love the benefits from using henna, I never really intended for my hair to end up so red.  We’re talkin’ Rhianna type red in the sunlight at this point.
    I’ve been debating this for a few months now.  Originally I decided that I would just order more indigo and do a two step henna/indigo process.  This is where you apply the henna like normal and after rinsing it completely, apply the indigo for another 30 minutes to an hour and rinse.  The result is Jet black hair and it is permanent.  I know from past efforts that black hair does not look so hot against my skin tone.  Somehow it makes my face look really red and I always have trouble adjusting my makeup palette to suit the black hair color.  Because of this, the darkest I can go is a dark brown.


    For this reason, I decided to go with Clairol’s Beautiful Collection in the color Darkest Brown which has a neutral base.  It is a formula that does not contain ammonia or peroxide.  I’ve read over on NaturalSunshine.ning.com that the Clairol line is pretty much the only one considered gentle enough for Natural hair.  I’m going this route because I figure the color result will be more predictable than trying to mix henna and indigo for the color I want.  The only thing I’m concerned about at this point is the Isopropyl Alcohol which can be drying.  I’m going to make sure and do a moisturizing deep conditioning treatment after rinsing the product and then do an ACV rinse to close down the hair cuticles.  I’ll post pictures after the application and do a review.

    Godrej Nupur Henna Review

    I’ve been using henna for the past year and a half now and can say that I have tried a few different types.  I use it to blend my greys with the rest of my dark hair and keep my scalp issues at bay.  Previously, I ordered it online but now purchase it locally from an Indian Grocery store.  Recently I picked up a new brand from Ananda Bazaar in Aurora, that I heard others rave about in the hair forums.  It’s called Godrej Nupur and is actually a mixture that includes brahmi (promotes hair growth), shikakai (cleanses hair and scalp), amla (darkens hair and prevents scalp infection) and bhringraj (conditions).  Finding all of these in one package is quite a deal.  I figured at $1.49 (USD) per package, the Nupur henna was definitely worth a try.

    I added green tea and juice from

    half a lemon
    One package of Godrej Nupur henna holds 60 grams so I used two packages for my hair which is past shoulder length and very thick.  I kept my mix pretty simple and just added green tea and juice from half a lemon.  I added enough water to make it into a yogurt like consistency and let it sit for a few hours.  Before applying it to my hair, I added a little more water so that it was creamy enough to work with.  One thing I noticed is that the texture of the henna is a lot smoother than some of the others I have worked with (i.e. Reshma and Jamila).  This made it very easy to apply.  The color took very well and did a good job of staining my greys that were starting to peek through. 
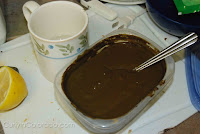
    Added plain water until the
    henna was a yogurt like
    consistency
    I have used the product twice since purchasing it and can definitely say that my hair appears to be darker which is more to my liking (I found out last year that my adding honey to my henna applications caused it to lighten my hair a little).  I was looking for a darker result so the Nupur henna works for me.  Even so, my hair still looks a deep burgundy color when I’m outside.  For this reason I’m currently looking to do the 2 step process where you apply henna and then indigo to go completely black.  Overall though, I enjoy using the Godrej Nupur and will make sure to keep it stocked in my ever growing henna stash.