DIY Eco Styler Gel Custard Recipe

After many months of searching for an alternative to Eco Styler Gel, I finally resigned to the fact that it’s the only gel that gives the hold and definition my curls crave.  Still, I always got the dreaded dry, crunchy feeling everytime I used it.  I usually apply a leave-in to my wet hair and seal the moisture in with an oil underneath the gel.  No matter what, I kept getting the same result.  After reading through the book, Curly Girl, by Lorraine Massey, I found out that the crunch or “cast” the gel leaves behind is actually a good thing.  This is when you know your curls have been set into place.  I found this to be true because after air drying, I’m usually able to fluff and style my hair without worrying about losing my curl definition.  The book suggests that you scrunch the hair to remove the crunch but I sometimes kept getting a dry feeling after this step.
I figured out that the combination of an oil and a mositurizer underneath the gel gave me much softer hair.  This however led to applying lots of products one by one.  By the time I reached the front sections of my hair it was dry and not as manageable.  I wanted a way to apply the products quicker so I decided to just whip them all together and came up with a nice custard consistency.  I’m realizing that this is a much easier way to apply my products and my curls love it!  
Here’s the recipe I came up with


Eco Styler Gel Custard


6 oz. Argan Oil Eco Styler Gel (or fill a 12 oz container half way)
2 Tblsp. Hollywood Beauty Olive Creme Hairdress for Dry Hair*
1 Tblsp. Castor/Coconut Oil Mix**


Place ingredients in a small container.  Whip together until all ingredients are combined.   The mixture will have a pudding like consistency. 


*You can substitute another moisturizer; one that pairs well with Eco Gel
**I use a 50/50 Castor/Coconut oil mix to seal my hair.  For this recipe I just used 1 Tblsp of my pre-mixed oil.

The Application

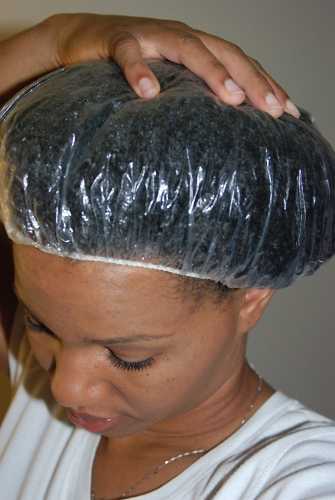
After cleansing and conditioning, I apply my leave-in conditioner (currently Paul Mitchell’s The Conditioner) to my hair while it’s still wet.  Next I section my hair into four sections to keep my hair up while I’m styling.  Within each section I make small parts and apply my Eco Gel Custard.  I use a smoothing and raking motion to help give the curls definition.  I’ve also started sealing the hair with oil after applying the gel custard for an even softer hold but this is optional.  Then, I let it airdry for about an hour or so before I use a blow dryer on the roots.  You can also plop the hair with a T-Shirt to help with the drying time or just continue to air dry.

Final Thoughts

I’m finding that the mixture also works on my edges when I wear my hair up.  I haven’t done a braid-out or twist-out with it yet but it looks like it may give good results.   I’m going to continue to play with the recipe but this version seems to work well on my hair which is a 4a/4b texture.  I’ve also started using it on my son’s curly 3b/3c/4a hair and it is also responding well.  The only thing I noticed is that I’m getting a lot more shrinkage because my curls just love the moisture.  To get more hang time I usually just stretch it by pulling it back at night.


My new Pre-Poo Method


My shiny, supple hair
after using a
Moisturizing Pre-Poo with honey,
olive oil and conditioner 

 I always do a moisturizing deep conditioning treatment on my hair prior to straightening it with my flat iron.  This usually means either using a conditioner that doesn’t contain any protein like Aubrey Organics Honeysuckle Rose or making up my own concoction using a cheapie conditioner as my base.  I like to add oils but this is too heavy right before I use heat on my hair.

A few months ago I rediscovered a video by Patchouli85 on YouTube that explained how to use a moisture rich deep treatment before using direct heat on the hair.  The only difference was she suggests that it be done prior to washing the hair with shampoo.  This would make it a Pre-Poo and means that it goes on dry hair instead of damp hair like I was doing before.  Her recipe was pretty simple and I improvised with what I had at home.  I think that the ingredient that made the biggest difference was the honey.  I have been deep conditioning my hair at least one time each week ever since my transition days.  Using her method was the first time I noticed a huge difference in the way my hair felt as I was rinsing it out.  My hair was a lot easier to detangle and I also had a much easier time with blowdrying. 

You would think that since you wash the treatment out with shampoo, you wouldn’t get the full benefit.  I’m guessing that since I’m applying it to dry hair and then using heat to open up the cuticles, my hair is absorbing the treatment so much better than before when I did it on wet hair.  When I straightened my hair after that first treatment, I could not believe the shine and how supple my hair felt.  It’s been so effective that it is something I have since decided to incorporate into my weekly regimen.

                                         My Pre-Poo Recipe
Conditioner (I use Suave Naturals Coconut)
1 Tblsp Extra Virgin Olive Oil
1 Tblsp Honey
1 Tblsp Extra Virgin Coconut Oil  (I use Vatika Oil for this part)
**You can also add 3 Tblsp of Mayo or Cholesterol conditioner depending on what your hair needs
I combine the above ingredients in a small plastic bowl until well combined.  I use as much conditioner as I think that it will take to make sure all of my dry hair is completely saturated.  Then I separate my hair into 4 sections and apply it while it is still dry, starting at the ends.  If there is any left, I go back and coat my hair again making sure to use up all of the mixture.  I put on a plastic cap and then sit under the dryer for 30 minutes.  Then I co-wash or shampoo it out depending on what style I’m wearing next.   

Easy Cheesecake Recipe


For our 10 year Wedding Anniversary, the hubby asked if I would make a cheesecake for dessert.  I thought, “Why not…It’s been a while since I’ve made cheesecake”.  Normally I just use the recipe on the back of the graham cracker box but, the one I picked up didn’t have one.  So, I searched for a recipe online the night before the big day.  It was too late to head out for any last minute ingredients.  After reading a few recipes, I figured out that I could probably pull something together using what I had on hand. 

The results…an easy cheesecake recipe that was good to the last slice.  Try it and you won’t be dissapointed.

Crust

Ingredients
10 whole graham crackers
6 tblsp. butter (salted)
2 dashes cinnamon
9″ Spring Form Pan

Preheat oven to 350 degrees.  Prepare pan with Non-Stick Cooking spray.

Crush graham crackers into fine crumbs (I used a food processor).  Set aside.  Microwave butter until melted.  Add butter and cinnamon to graham cracker crumbs.  Using a fork, mix the ingredients until the crumbs are moist with butter.  Pour into springform pan.  Use the back of a spoon or measuring cup to smooth the crust into the bottom of the pan and up the sides.  Bake in preheated oven for 8 minutes.  Set aside to cool.  Turn oven down to 325 degrees.

Cheesecake

Ingredients

2 pkg.’s Cream Cheese (room temp)
1/3 Cup Sugar
1 tsp. Vanilla
1/4 Cup Plain Yogurt
2 Eggs
Lemon Zest from 1 Medium size lemon
1 can Cherry Pie Filling for topping-optional

Preheat oven to 325 degrees

Using a mixer, blend Cream Cheese and Sugar until well combined. Add Vanilla and Yogurt. Mix until creamy. On low speed, add eggs, one at a time. Fold in Lemon Zest. Pour mixture into prepared crust. Bake in preheated oven for 45 minutes (will be jiggly in the middle). Run knife around the outside of crust to seperate from pan (to prevent cracks). Allow to cool on cooling rack. Place in refridgerator overnite. The cheesecake can be served plain or with optional topping.  Enjoy!
TIP:  To release cake from pan bottom, set on top of eye on the stove to warm the bottom slightly.  Since the crust is made with butter, it will release with the help of a knife and slide onto a cake platter.  Place back into fridge until ready to serve.

Summertime Lemon Iced Tea

My husband and I love Iced Tea.  I came up with a recipe that is quick and not too sweet.

Tools
1) 2 quart Pitcher
1) 2 Cup Measuring Cup
Ingredients
2 Large flow thru Iced Tea bags
Luzianne or Lipton brand
2 Cups water (for brewing)
1/2 Cup sugar
4 Lemon slices
Place the two tea bags in the measuring cup and fill with water to the 2 cup line.  Brew tea in the microwave for 2 minutes and 45 seconds.  When the microwave stops, leave the cup and teabags to steep in the microwave for 12-15 minutes.  While the tea is brewing, slice a small lemon in half and thinly slice one half to make 4 slices.  Place the slices in the bottom of the pitcher.  Add in the sugar.  Once the tea is finished brewing, pour into the pitcher covering the sugar and lemons.  Stir the mixture until the sugar dissolves.  Fill the pitcher to the top with cold water.  Slice up the remaining half lemon for garnish.  Serve and enjoy!