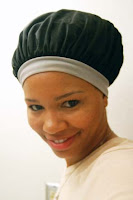
Gearing Up for Summer

Finally here in Colorado we are getting some warmer weather.  That weekly snow storm business was beginning to drive me crazy!  Every time I saw the cold temps coming I cringed at the idea of wearing a Wash n’ Go.  Curly hair is great but, wet hair when the weather is cold is not so great.  As a result, I have been wearing my hair either straight or in stretched styles.

HAVANA TWISTS INSPIRATION VIDEO

Now I’m beginning to wonder what style I want to rock for the summer months.  I’m thinking about maybe taking on Havana Twists.  These are twists done using Marley Braid hair but much larger (and faster) than mini or medium size twists.  It looks like it may be easy to install but I haven’t done my own extensions in ages so who knows what I’ll get.

I’m also loving the medium size, “Poetic Justice” type box braids.  I would also be doing these myself but I tried to practice recently with some leftover hair from last time and it didn’t go so well.  Until I make up my mind and try to tackle a summer protective style, I’ll be either straight or curly depending on what activities my family and I have planned.  Since the warm weather is late here I’d better hurry up and decide before it’s too late!

BEAUTIFUL BOX BRAIDS INSPIRATION VIDEO

Night Time Routine for the Corkscrew Braidout


The Corkscrew Braidout


I recently posted a video showing how I do my Corkscrew Braidout.  I call it this because of the way I roll the ends of each braid so that it makes a smooth spiral. 
The look is great for special occasions or when I just want big, curly hair.  To date, I have been able to keep the look going for about three days before it starts to look a little less than cute. 
I “Pineapple” the
Curls on top of my
head

I do the pineapple method by pushing the curls up on top of my head and wrapping it up with my satin scarf and bonnet. 

First, I push all of my hair upwards and then use bobby pins to keep it pulled back off of my face and up in the back. 

Then I use a loose band to put all of my hair in so it stays up.  After the hair is up, I fold a square satin scarf in half to make a triangle and use that to wrap around the
 sides so they don’t get fuzzy. 


I protect the look
 with a satin bonnet


Finally, I put my satin bonnet on over the whole thing to protect the curls at the top and that’s it.

I like the lightweight feel of this style so I just use a tiny bit of coconut oil each night before I wrap it up.  When the look starts to get old, I either co-wash or just pull it back into a bun for another day or so.

Natural Hair Style–The Corkscrew Braidout

I’m finally all finished with my Corkscrew Braidout video. When I blogged about this style a few months ago, I realized that the process may be easier for other naturals to follow if I just illustrated it in a video on my channel. This has become my go-to style for special occasions because I don’t have to use any heat to get a fluffy, curly look. The other reason why I wanted to get this tutorial up is because I noticed that there aren’t that many videos on natural hair styles that use setting lotion as the main holding product. I never thought to use it for a braidout but it works great while leaving the hair soft and lightweight. I’m just glad to have finally found a braidout method that is pretty much fool proof and delivers every time.


See more of my videos on my channel “mitchellzee” on Youtube.com

Rockin’ My Fluffy Fro


Early on in my natural hair journey I started trying styles that I could do at night.  I was finally understanding that my hair would thrive if I could just stay away from the flat iron every morning.  Little did I know that there would be a lot of trial and error.  The braid-out style has always kept me guessing because I could never get it quite right.  Either I chose the wrong products, separated the sections too much or it simply wasn’t dry in time. 

I’ve come to realize that every braid-out I do is different depending on so many different factors.  So instead of cringing at the first sign of poof, I’m learning to just go with it.  In the end, the technique is altering my tight, curly fro and stretching my hair.  This helps with tangles and those nasty little single strand knots.  While I am pleased when the style results in lots of definition and curl, I’m also learning to accept the big fluffy look I sometimes

get.  Most importantly, I rock it in public so that others can see that big hair is beautiful and it’s here to stay.

The Satin Braid-Out

I joined yet another group over at the K.I.S.S. network. This time it’s a group where we will be doing “Satin Braid-Outs” and sharing info on how to perfect the look. I watched a video on YouTube by NinaPruitt where she demonstrates how to do it. I used a long satin scarf that I thought would work and cut it into 4 strips. I cut it using pinking shears because I didn’t want the fabric to fray. My hair was freshly washed and conditioned so I applied the KimmayTube Leave-in where I substituted Giovanni Direct Leave-In for my creamy base and coconut oil instead of jojoba oil. Then I sealed in the moisture with my castor, coconut and olive oil mixture.

The braiding wasn’t as tricky as I expected. It was just like adding extension hair to a braid except you’re using a piece of satin fabric. My strips were not quite long enough though so tyeing the ends was a little awkward. The next morning, my hair was very defined but, the strips did leave small pieces of frayed fabric in my hair. I did not enjoy picking those out of my hair all day. Also, my hair was still damp which I knew would lead to crazy, frizzy hair so I put it up into a protective style.
So it’s back to the drawing board on this one. I’ll have to check back with my group and find out what other ladies are doing for this style. I really hope to get the braid-out down because I know it will come in handy later on.