What Has My Hair Been Up To?

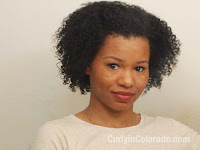
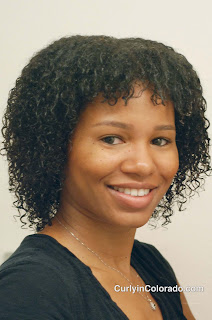
Whoa!  Blogging for the first time in a loooong time.  I also took a break from my Youtube channel for a little while but I’m feeling motivated so here I am.  This first post back I thought that maybe I would share pictures of some of the styles I’ve been rockin’ while away from the blog.  I pretty much have been going back and forth between curly and straight.  It has really been a learning experience because I have been forced to really pay attention to my hair and watch for damage.  Yes, the dreaded heat damage that I swore I would do my best to avoid!  Oh well, when it comes down to it I just really enjoy variety and my hair is no exception.


During this time I have rediscovered the Aphogee product line that I used in my Transitioning days.  I’ve been experimenting with the Leave-in (a spray) and the 2 Minute Reconstructor.  I credit both for helping me to retain my curly texture after each heat use.  Now normally you wouldn’t think it necessary to use protein based products on natural hair but in my case, it’s essential.  I’ve seen first hand how heat can do major damage to my curls so the protein just helps to strengthen my hair where it needs it.

I haven’t forgotten about my henna though.  I still like to use it for covering my greys but may get back to using it in the form of henna glosses for conditioning.  Overall, I’m pretty happy with where my hair is right now.  I would like to see a little bit more length though so we’ll see where it ends up; no hurry.

By the way, I’m posting videos more often on my channel on Youtube called, Mitchellzee so check that out for updates on my hair journey, tips and reviews.  Ciao!

1/2 WIGGIN’ IT
WASH N’ GO WITH A HUMP
1/2 UP 1/2 DOWN

WASH N’ GO WITH BANGS PINNED BACK
STRAIGHT
STRAIGHTENED AGAIN
WASH N’ GO (WET HAIR)
SLICKED BACK/ BANDED PONYTAIL

DONUT BUN
CURLY BRAID OUT

Healthy Hair and Skin from the Inside

Recent twist and curl style

I am pretty happy with my hair recently and am feeling like things are getting back to normal.  By that I mean I was having some issues with dry, flaky scalp followed up by a month or two with heavy shedding.  Both issues are finally getting under control so I have been uploading to my YouTube channel more often with hair tutorials.  Before now though it was so frustrating to do anything with my hair because I almost felt like there was no point.  The flakes made it look so bad that I didn’t even want to go out some days.

One of the things that I think helped was that I started working on my immune system to help get my skin under control.  I have psoriasis and I have known for a while now that the inflammation in my skin is because of something not quite right with my immune system.  When the psoriasis flared up I started introducing probiotics into my system by eating a serving of Activia yogurt each day.  This helped with digestion and made it possible for my body to absorb my supplements better.  After doing that for 2-3 weeks I decided to go back to a more effective multi-vitamin formulated for women.  It costs more but has proved to be much better for my body than the usual store brands.

So happy my scalp is finally clearing up

I also added some supplements to my daily routine like garlic, super B-Complex and vitamin E.  The garlic helped with the shedding and didn’t start working right away but I can tell that I am shedding fewer hairs per wash session now.  I would say it took about a 3-4 weeks before it started to make a difference.  The B-Complex contains biotin and I can see that it is helping my nails so hopefully it’s doing something for my hair as well.  The Vitamin E is a given because it’s known for being good for the skin.  I usually try to take my multi-vitamin on its own  and then the other supplements together at another time during the day.  Both times are with a meal.  I also started drinking Green Tea for the antioxidants and increased my daily water intake.

With the Colorado climate being especially dry right now,  I hope that this regimen will get me through the winter without having anymore problems.  For now,  I’m using shea butter to moisturize my skin and staying away from heavy oils on my scalp to avoid build-up.  I’ve also started doing more finger detangling instead of using a tool to get rid of shed hairs.  

NOTE:  As with anything health related be sure and speak with a physician when considering adding vitamins and supplements to your daily routine  

Jumbo Rake Comb Review

When I was talkin’ hair with my mother a couple of months ago she showed me a picture of a comb that she was interested in trying.  She checked out a copy of the book, “The Science of Black Hair” from the library and it listed a “rake” comb as a suggestion for detangling natural hair.  I remembered seeing the comb online (probably in a Youtube video) but didn’t exactly know where to track one down.  Recently however, I was at the Big Beauty Supply Store in Aurora, and noticed some for sale.  It was by the Annie brand and was called a “Jumbo Rake Comb”.   I figured I would grab it for my mom so she wouldn’t have to keep looking for it.  I thought that maybe I would give it a try too and since they were only $1.49 plus tax (USD) I bought two.

Jumbo Rake Comb for only
 $1.49 plus tax!

I didn’t really know what to use the comb for because I already felt like I had every comb that I needed.  I decided to use it one night when I was twisting my hair up after wearing it in a wash n’ go style.  I was surprised at how well the comb detangled my hair.  It’s almost like the front end helped to pull apart the tangles but the spacing toward the back end of the comb allowed my hair to glide right through.  When I saw this I decided to try it the next time I detangled my hair in the shower.

My normal routine for detangling is to do it while my hair is soaking wet and saturated with Tresemme Naturals conditioner.  I usually begin by finger combing my hair first which helps me to remove a lot of the shed hair and tangles before moving onto a comb or my denman brush.  So when I tried the Jumbo Rake comb my hair was already free from any major tangles.  Still, I knew that I would be doing a roller set that night so I needed to make sure my hair was thoroughly detangled beforehand.


My twists
used the rake comb
to detangle


Once again, the comb performed beautifully.  I was really surprised because I didn’t expect for it to be any different from my wide tooth comb.  Somehow though having the teeth closer together toward the front and wider in back is what I think makes it a more effective tool for detangling.  It really is able to pick apart at the tangles but the hair glides through.  You’d have to try it to see what I mean.  As for me, I do think that I’ll be using this instead of my denman brush because it removed shed hairs but not so many to cause concern.

My Mom’s hair sectioned and detangled with
the rake comb

I even tried it a week later when I was straightening my mom’s hair.  She is transitioning to natural and has about two inches of new growth.  I applied Paul Mitchell’s The Conditioner and a heat protectant to each section of her hair and then detangled with the rake comb.  Her hair was only damp but the comb still did a pretty good job.

I give it a thumbs up and would recommend it to anyone looking for a good comb for detangling.

My Sort-a Kind-a Curly Girl Method

Earlier this summer I mentioned in one of my YouTube videos that I was not a fan of the Curly Girl method (CG) because it seemed to do a number on my scalp.  I have issues with dry scalp off and on throughout the year.  This year it seemed to really flare up when I started this method because of the constant conditioner only washing.  Well, I’m still dealing with it now but have gone back to wearing my hair curly everyday.

Curls Up-close

I’m not following the CG method exactly but I just don’t see the point in wearing stretched styles when I know my scalp needs to be cleansed more often.  However, I did learn a few things from Lorraine Massey’s book, Curly Girl, the Handbook

There is one step that I learned from the book which helps immensely with my new daily washing/co-washing routine.  It’s called a, “pre-cleanse”.  With this step you just apply conditioner or sulfate free shampoo prior to getting in the shower to wash your hair (book version).  I altered this method a little because I prefer to apply loads of cheapie conditioner like Suave’s Naturals Coconut (my staple) instead of the amount suggested.  I do this in sections and it really helps me to pull out shed hairs and tangles.  It also elongates my hair which is usually shrunken up into a tight curly fro from the day before.

I’m still using sulfate shampoo and my favorite leave-in conditioner (Paul Mitchell’s The Conditioner) which has silicones in the ingredients list.  For this reason I can’t say that I’m abiding by the “rules” outlined in the book.  Sulfates and Silicones are big no-no’s with this method but I make sure to use Apple Cider Vinegar (ACV) rinses to help resolve any issues there.  Not only does the ACV help remove build-up but it also helps my hair to return back to a normal pH after using the shampoo.  This is important because this leaves my hair more manageable by closing the cuticle layer back down.  It also helps with moisture retention.  I love ACV rinses!

My hair is definitely benefitting from all of the moisture it has been getting.  I have been rockin’ wash n’ gos for six weeks straight and can’t really see myself quitting anytime soon.  I usually do my hair at night so I’m not too worried about having wet hair in the mornings when I head out.  Hopefully I will begin to see tons of growth and length retention in the upcoming months.

Tips on How to Define Type 4 Curls

My hair wet with product

Sometimes I feel like I should be crowned the Wash n’ Go queen by now after all of the products and techniques I’ve experimented with to achieve the curly look.  Washing my hair and just heading out the door is never the case.  I have curls but they are “type 4” curls.  Yes, I’m talking about the hair typing system.  It’s not my favorite way to categorize my hair but hopefully it will give others a way to gage whether my techinques will work for them.

My curls are tight corkscrew coils, lazy “s” shapes and everything in between.  I even have a section that laughs at the idea of curl definition.  Oh and let’s not forget about the shrinkage.  I would say mine can be up to 75% but it depends on the day.

In order to get my curls to pop, there are certain things that I must do in order to get the definition I want.  Just so you know, I’m usually looking for hair that will last me a few days without feeling drastically dry and brittle.  I’m still looking for a softer hold solution but at least I’ve got the curl definition part down.

Here are some things that I have learned when styling my own hair
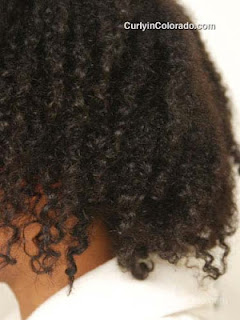
My hair freshly washed and detangled
using a denman brush.
Dry with no product

1.  Start with clean hair

For some this may mean co-washing; for others, shampoo.  I’ve noticed that I really do get the best results after cleansing my hair.  Otherwise, I end up with so-so results.

2.  Detangle, detangle, detangle

There are times where I skip this step and I always pay for it.  Not only does this cut help to cut down on the time it takes to apply the products but the hair is also way easier to work with.  Whether you’re shingling, raking or combing product through remember to start with detangled hair.

3.  Make sure hair is soaking wet

When my hair begins to dry, all of those pretty little curls go poof!  Any curl defining product out there is really just a way to lock your curls into place.  My hair is at it’s curliest when it’s dripping wet so I start with that.  When sections begin to dry, I make sure to keep a spray bottle handy so I can wake those curls back up.

4.  Work in small sections

We’ve all seen the videos where someone takes a quarter size amount of product and applies it to all of their waist length hair and voila; curl definition.  Not for our hair texture!  It’s best to keep the sections as small as possible so that each and every little curl can get enough product from root to tip.  Sometimes, big hair is desirable but if you want every curl accounted for, using smaller sections is the way to go.

I get lots of curl definition using product
on wet hair

5.  Smooth those ends

After I have completely raked the product through a section, I always go over my ends, using my fingers, to smooth them out.  This will ensure that the curl lays flatter and discourages those stubborn single strand knots.

6.  Once the products are all in, LEAVE IT ALONE!

This is a biggie.  I’ve done it myself more times than I can count.  Still, you’ve got to leave your wet hair be until you’ve got that, dried “cast” that tells you it’s okay to touch your curls.  Even if you choose to diffuse, remember not to handle your hair with your fingers because this will cause lots of unwanted frizz.  Simply tilt your head and let your curls drop into the diffuser so that it can do its’ thing.

 I hope these tips will help someone out there.  I sure wish I would have known all of this long ago when I first went natural.  Still, I’m pretty happy with my coily creations and that’s all that matters.