My new Pre-Poo Method


My shiny, supple hair
after using a
Moisturizing Pre-Poo with honey,
olive oil and conditioner 

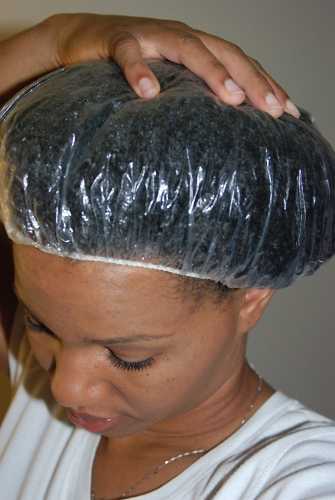
 I always do a moisturizing deep conditioning treatment on my hair prior to straightening it with my flat iron.  This usually means either using a conditioner that doesn’t contain any protein like Aubrey Organics Honeysuckle Rose or making up my own concoction using a cheapie conditioner as my base.  I like to add oils but this is too heavy right before I use heat on my hair.

A few months ago I rediscovered a video by Patchouli85 on YouTube that explained how to use a moisture rich deep treatment before using direct heat on the hair.  The only difference was she suggests that it be done prior to washing the hair with shampoo.  This would make it a Pre-Poo and means that it goes on dry hair instead of damp hair like I was doing before.  Her recipe was pretty simple and I improvised with what I had at home.  I think that the ingredient that made the biggest difference was the honey.  I have been deep conditioning my hair at least one time each week ever since my transition days.  Using her method was the first time I noticed a huge difference in the way my hair felt as I was rinsing it out.  My hair was a lot easier to detangle and I also had a much easier time with blowdrying. 

You would think that since you wash the treatment out with shampoo, you wouldn’t get the full benefit.  I’m guessing that since I’m applying it to dry hair and then using heat to open up the cuticles, my hair is absorbing the treatment so much better than before when I did it on wet hair.  When I straightened my hair after that first treatment, I could not believe the shine and how supple my hair felt.  It’s been so effective that it is something I have since decided to incorporate into my weekly regimen.

                                         My Pre-Poo Recipe
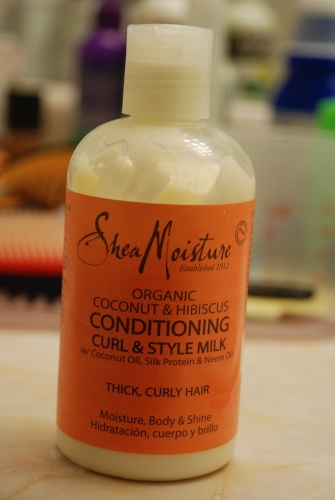
Conditioner (I use Suave Naturals Coconut)
1 Tblsp Extra Virgin Olive Oil
1 Tblsp Honey
1 Tblsp Extra Virgin Coconut Oil  (I use Vatika Oil for this part)
**You can also add 3 Tblsp of Mayo or Cholesterol conditioner depending on what your hair needs
I combine the above ingredients in a small plastic bowl until well combined.  I use as much conditioner as I think that it will take to make sure all of my dry hair is completely saturated.  Then I separate my hair into 4 sections and apply it while it is still dry, starting at the ends.  If there is any left, I go back and coat my hair again making sure to use up all of the mixture.  I put on a plastic cap and then sit under the dryer for 30 minutes.  Then I co-wash or shampoo it out depending on what style I’m wearing next.   

Goody Brand Hair Accessories at the Dollar Store

Rockin’ my new headband
from the dollar store

I was recently watching a YouTube video by one of my favorite online naturals, ItsMeMonchhichi, and found out that the Dollar store sometimes carries Goody Hair bling.  Of course, as with everything else, I had to check the Dollar Tree in my ‘hood because Colorado can sometimes get passed up on products. 

I was pleasantly surprised to find headbands, ponytail holders and mini clips manufactured by Goody.  I love to look at these in stores like Walmart and Target but can never bring myself to pay $5 or more for headbands.  When I saw some at the dollar store I quickly grabbed them up.  I also grabbed a pack of four mini clips but one of them broke on me.  I still have three left so I’m not too worried; they were $1!  Now I know where to go when I need something to spiff up my puff or wash n’ go styles but still want to keep a little money in my pockets.

Shea Moisture Products at Walgreens


Shea Moisture Products
Now available at Walgreens stores


All the hair forums and blogs are buzzing about the Shea Moisture line which is now available at Walgreens stores.  The drugstore chain is doing a BOGO this week on all of the items in the line so if you’ve been thinking about trying it out, now is the time! 
Prior to this, the Shea Moisture line was only available at Target stores or online at Target.com.  The products are made with natural and organic ingredients and are very affordable with each item going for $9.99 USD. 


Shea Moisture’s
Dandruff & Dry Scalp Elixir


Even with all of the excitement on this promotion, I still wasn’t too sure that the Walgreens in my area would have the Shea Moisture line stocked yet.  So tonight I decided to stroll by the hair aisle just to check and see if they had it.  There wasn’t any Shea Moisture to be found.  I figured that maybe this Walgreens was a little bit late but then I stopped by the new items near the door and found a very small display with maybe five items from the line.  There were only one or two of each item.  I’m hoping that there will be some Curl Enhancing Smoothie left when I get around to shopping this Friday.  I already told my husband that I’m gearin’ up for a product haul this week so look out Walgreens, I’m comin’!

Night Time Routine for the Corkscrew Braidout


The Corkscrew Braidout


I recently posted a video showing how I do my Corkscrew Braidout.  I call it this because of the way I roll the ends of each braid so that it makes a smooth spiral. 
The look is great for special occasions or when I just want big, curly hair.  To date, I have been able to keep the look going for about three days before it starts to look a little less than cute. 
I “Pineapple” the
Curls on top of my
head

I do the pineapple method by pushing the curls up on top of my head and wrapping it up with my satin scarf and bonnet. 

First, I push all of my hair upwards and then use bobby pins to keep it pulled back off of my face and up in the back. 

Then I use a loose band to put all of my hair in so it stays up.  After the hair is up, I fold a square satin scarf in half to make a triangle and use that to wrap around the
 sides so they don’t get fuzzy. 


I protect the look
 with a satin bonnet


Finally, I put my satin bonnet on over the whole thing to protect the curls at the top and that’s it.

I like the lightweight feel of this style so I just use a tiny bit of coconut oil each night before I wrap it up.  When the look starts to get old, I either co-wash or just pull it back into a bun for another day or so.

Natural Hair Style–The Corkscrew Braidout

I’m finally all finished with my Corkscrew Braidout video. When I blogged about this style a few months ago, I realized that the process may be easier for other naturals to follow if I just illustrated it in a video on my channel. This has become my go-to style for special occasions because I don’t have to use any heat to get a fluffy, curly look. The other reason why I wanted to get this tutorial up is because I noticed that there aren’t that many videos on natural hair styles that use setting lotion as the main holding product. I never thought to use it for a braidout but it works great while leaving the hair soft and lightweight. I’m just glad to have finally found a braidout method that is pretty much fool proof and delivers every time.


See more of my videos on my channel “mitchellzee” on Youtube.com