What My Hair Has Been Up To

I know I haven’t been posting very much lately but I wanted to share some of the styles that I have been rockin’ the last few weeks.  I have actually been wearing my hair straight a little more which I think is coming to an end this week.  At least until I can get my hands on a flat iron that has a heat dial so I can adjust the temperature setting.  My FHI Technique G2 straightens really well but only has one setting…400+ degrees!  I know that a lot of you are thinking why use heat in the first place?  I know, it can be damaging but, I’m one of those Naturals who likes to use it occasionally.  Anywhoo, enough of the straight talk and on to the pics. . . Enjoy!

Corkscrew Braid Out
at the Denver Art Museum

Flat Twist Up Do
My current favorite during the week
to keep my hair protected

Corkscrew Braid Out
with Satin Scarf Headband
with Eco Styler Gel on my edges
Corkscrew Braid Out
Back View

Straight Hair in August just
before Trim

Wash n’ Go at City Park

Biking with Natural Hair

My Bike Helmet
with Flat Twists Underneath

My family and I love going on outdoor adventures.  This summer we have been doing a lot more bike riding together.  I always make sure that the kids wear their helmets but I haven’t really been into wearing mine.

That was until I noticed nearly every other adult on the bike path wearing theirs.  At the very least they had on a cap for sun protection.  So I decided it was time to get out the old bike helmet.  Never mind the fact that it makes me look like Kazoo from the Flintstones.  Safety first, right?  The only thing I had to figure out though was what to do with my thick, curly hair underneath.

When I go for a bike ride in the morning, the solution is pretty simple.  My hair is usually in twists or braids from the night before so I just wait until after the bike ride to take my hair down.  This means shuttling the kids to school while wearing a satin scarf on my head but hey, I know I’ll be cute later on in the day, so that’s alright.  I don’t even bother removing the scarf because it protects my hair while under the helmet.  Another option is after a braid out when my hair is more flexible, I can get my hair to “lay down” under the helmet without too much of a fight using bobby pins.

Flat Twists under Helmet
Back View

Other times though when my hair is up in a bun or puff, the helmet doesn’t really work.  Still, in Colorado you really can’t get away without some type of sun protection.  The high elevation here can make for some serious sun exposure so I still like to wear a visor and leave my hair up on top of my head like in the pic below.

So there you go Natural Hair Queens and Curly Goddesses…now there is no reason not to rock your head gear while on your bike ride.  Be safe and happy riding.

Rockin’ the Bun with
My Visor

Clairol Semi-Permanent Color Rinse Results

Applied the color rinse
in sections to damp hair
In my last post I talked about doing a Dark Brown color rinse on my hair to help tone down the burgundy red tones from using Henna.  Unfortunately, I have not had much luck with the Beautiful Collection product by Clairol.  I don’t think it’s the product itself but my regimen that does not work with color rinsing. 

The first thing I didn’t like is that I had to apply the product all over whereas with something more permanent you’re just re-touching the roots after the first application.  I just figured I would start with this to see if I liked the color on me.  The other thing is that the product rinses out easily with conditioner. 

See what had happened was. . . Prior to applying the rinse, I decided to shampoo my hair so that it was free from any build-up.  Then I applied the rinse and left it on for the suggested amount of time 25 minutes (10 minutes of that was under the dryer).  I rinsed until the water ran clear and then did a deep conditioning treatment which sent me back under the dryer.  I think this is where I went wrong.  When I rinsed the conditioner out in the shower I saw a lot of the color rinsing out with it.  I followed up with an ACV rinse to close down the cuticles of my hair strands and towel dried.  I was planning on wearing my hair straight so I let it air dry overnight and flat ironed the next day.  When I went out into the sun…STILL BURGUNDY!  I was up all night doing my hair and the color didn’t even take but like I said, the deep conditioning with heat is probably what did it.  I thought that maybe the hair cuticle opened up because of the heat from the hooded dryer and the color released.
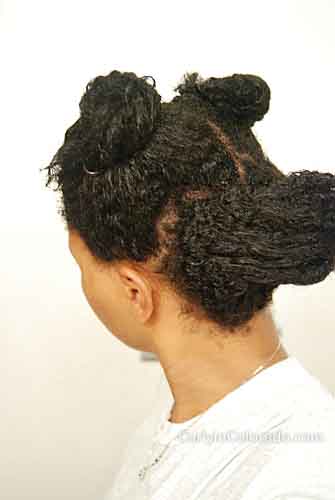
My hair color the next day…still burgundy
 

I figured I would try one more time a few weeks later and this time just rinse the color out, apply conditioner in the shower, detangle and leave it at that.  I mean, I know Clairol doesn’t think I can shampoo, apply a color rinse and not use conditioner to get my hair back in order do they?  Well, apparently I’m the crazy one because the color (after detangling and rinsing the conditioner out with cool water) came out again! 

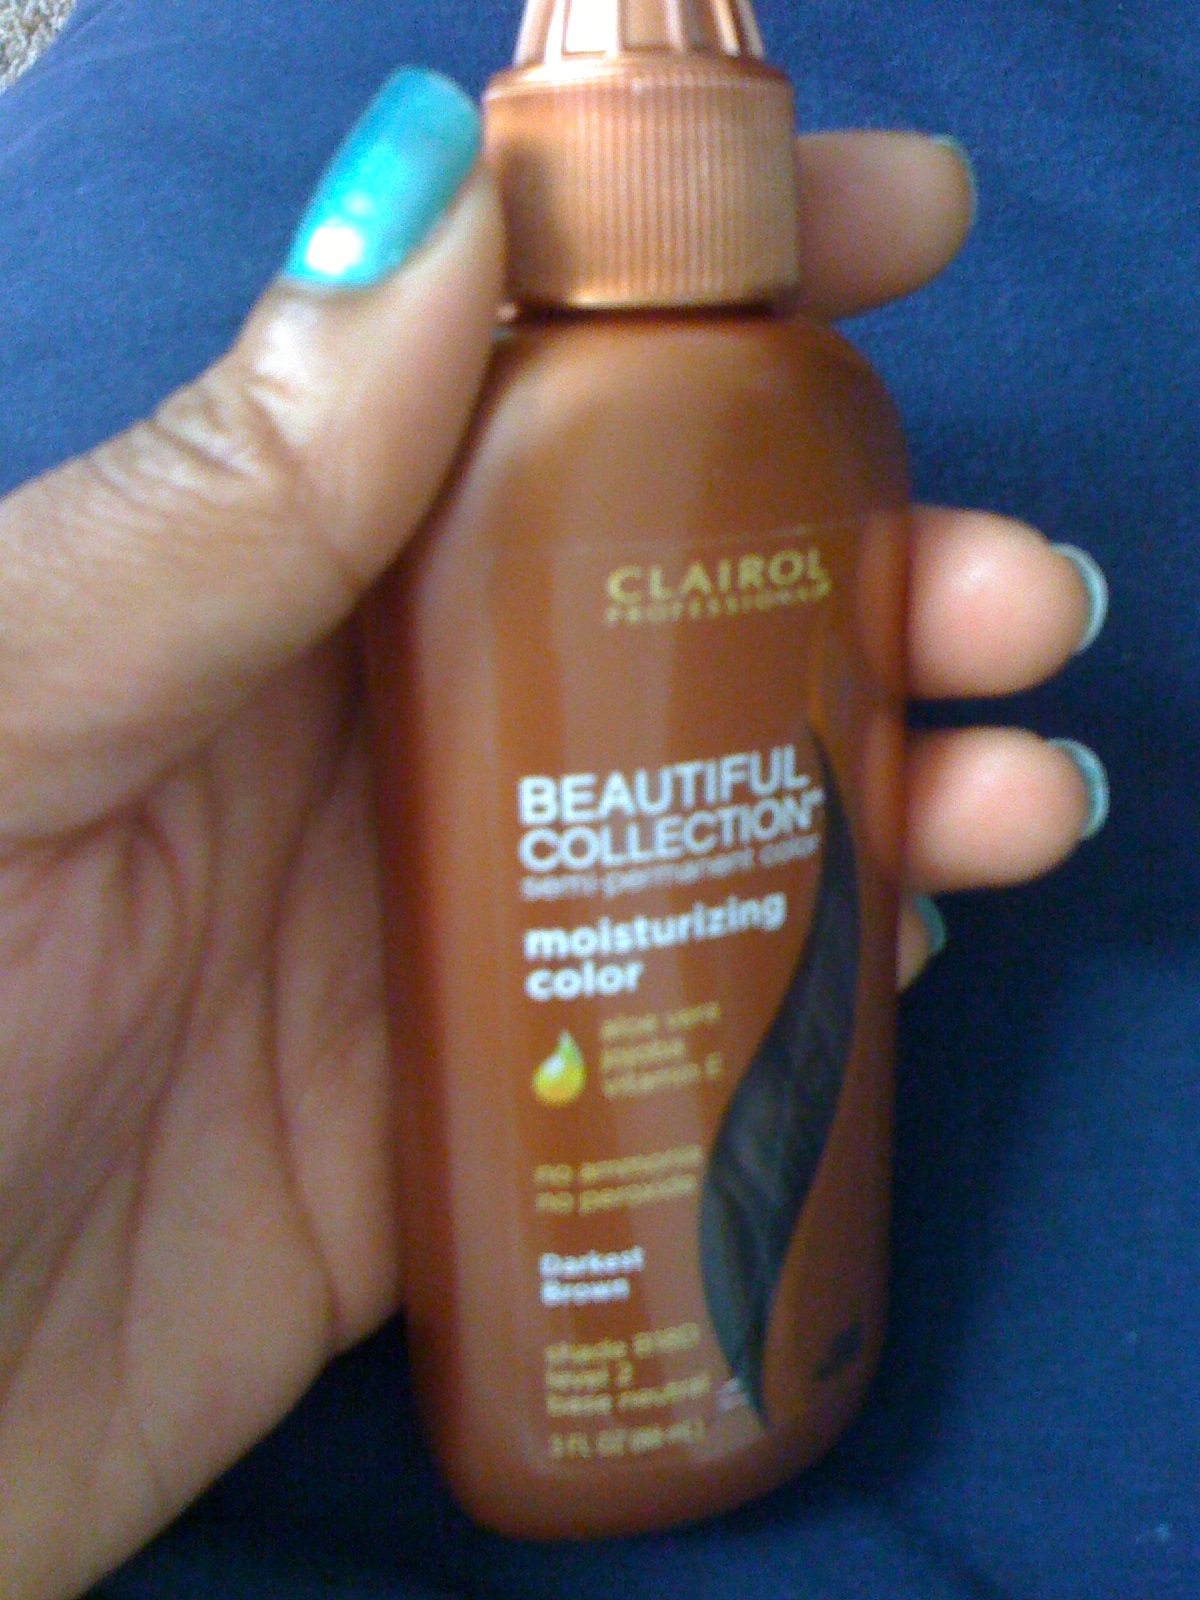
The product in question
Clairol Beautiful Collection
Semi Permanent Color Rinse
in Darkest Brown

Part of me keeps thinking back to when I told my mom about adding deep conditioning treatments to her routine.  The semi-permanent color rinse by Clairol is the very reason why she wouldn’t (or couldn’t).  She explained to me that the color kept rinsing out when she tried to deep condition so she stopped…Hmmmm.  Well, anyway I can see now that I’m going to end up going with something more permanent next go ’round.  Maybe the 2 step Henna/Indigo is the right choice for me after all.  To be continued.

Semi Permanent Color Over Henna


burgundy hair color after using henna
My burgundy hair after using henna


As you can see from the title, I have finally decided that I’m going to attempt to cover my currently burgundy hair with a Semi-Permanent rinse.  When I started using henna I mixed it with Indigo in order to get a brunette effect.  I was never really successful but continued to use henna each month for the past year or so.  Although, I love the benefits from using henna, I never really intended for my hair to end up so red.  We’re talkin’ Rhianna type red in the sunlight at this point.
I’ve been debating this for a few months now.  Originally I decided that I would just order more indigo and do a two step henna/indigo process.  This is where you apply the henna like normal and after rinsing it completely, apply the indigo for another 30 minutes to an hour and rinse.  The result is Jet black hair and it is permanent.  I know from past efforts that black hair does not look so hot against my skin tone.  Somehow it makes my face look really red and I always have trouble adjusting my makeup palette to suit the black hair color.  Because of this, the darkest I can go is a dark brown.


For this reason, I decided to go with Clairol’s Beautiful Collection in the color Darkest Brown which has a neutral base.  It is a formula that does not contain ammonia or peroxide.  I’ve read over on NaturalSunshine.ning.com that the Clairol line is pretty much the only one considered gentle enough for Natural hair.  I’m going this route because I figure the color result will be more predictable than trying to mix henna and indigo for the color I want.  The only thing I’m concerned about at this point is the Isopropyl Alcohol which can be drying.  I’m going to make sure and do a moisturizing deep conditioning treatment after rinsing the product and then do an ACV rinse to close down the hair cuticles.  I’ll post pictures after the application and do a review.

Review-The Hair Stopper

The Hair Stopper
at Walmart for about $4.50
I recently bought an item that I thought would help with the shedded hairs that collect in our bathtub. This may not be very pleasant to discuss but I still thought I would share my experience with a product called, the Hair Stopper.  My husband has long straight hair and washes it almost daily.  I like to co-wash a couple times each week and also detangle my hair while under the running water of the shower.  I won’t go into detail but we were in need of something to help with the hair that kept building up in the tub.  I found the Hair Stopper at Walmart for about $4.50 USD and was really hoping that it would work for us. 

How it works is you’re supposed to remove the little grate that already covers the drain in the tub.  Then insert the Hair Stopper, which says it should fit most household drains, into the drainage hole.  It ended up fitting so I figured all things were a go.  Did it work you ask?  Well, let’s just say that it did stop. . . the WATER from going down the drain!  I felt like I started out taking a shower and ended up wading in bath water.  I mean what gives?!  I tried to tweak it a little but it still acted like a plug and not a catch-all.  I planned on returning it later that week, but of course, my crazy dog, Grover, thought it would make a great chew toy.  Needless to say, it’s back to the drawing board on this one.