Henna Gloss How To

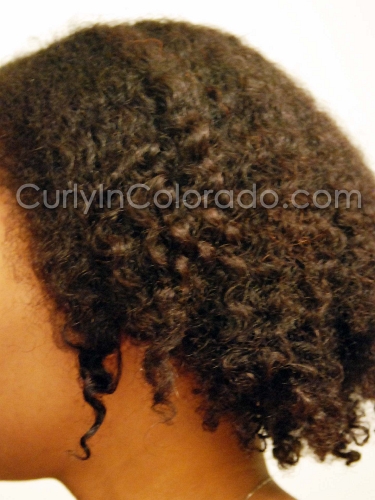
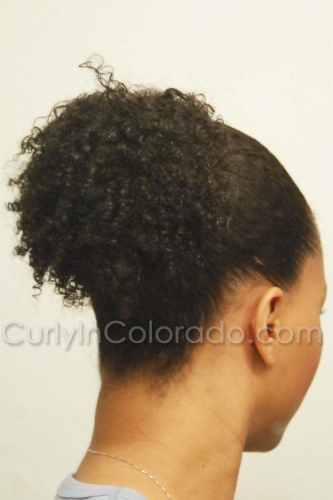
I like to use Henna to blend in my grays and strengthen my hair but I don’t always have time to do a full Henna application.  I read up on Henna glosses sometime last year and now I’ll do that when I’m short on time or just want to stretch my Henna stash.  It’s like doing a deep conditioning treatment with Henna added.  This way you get some of the benefits of Henna without the long, messy process.

Henna Gloss using
Henna, Conditioner and Natural Oils
Basically, instead of using enough Henna powder to cover all of your hair, you only need a couple of tablespoons.  You still mix it with water, green tea or lemon juice which will start the dye release process.  I add enough to make it into a pudding like consistency.  Then, when I’m ready to apply it, I add lots of my Suave Naturals Coconut Conditioner for a creamy base and then whatever natural oils I chose for deep conditioning.  Recently I even added plain yogurt to the mix and was really surprised by the results.  My hair felt so lush afterwards it wasn’t even funny!

I like to dampen my hair before applying the Henna gloss because it seems to go on a bit easier that way.  After it’s all in I sometimes sit under the dryer with a plastic baggie for maybe thirty minutes and then leave it on for awhile after that.  Rinsing it out is waaay easier than rinsing out a full henna treatment.  The conditioner gives a lot of slip so it comes right out.  Then I like to co-wash to make sure that I got it all.  It’s easier but still helps to blend my gray strands…can’t beat that.

Back to Basics: The Apple Cider Vinegar Rinse

I was never really a big fan of doing Apple Cider Vinegar Rinses when I started out on my natural journey.  I kept reading how it worked as a clarifier.  I even watched (and understood) KimmayTube’s videos on pH Balance and knew how it worked to close the hair cuticle.  Still, no matter how many times I tried, it just didn’t seem to do anything for my hair.  Then I found out about the Organic Apple Cider Vinegar by Bragg’s.  I thought maybe that would make a difference but it still seemed like nothing was happening.

My hair after an Apple Cider Vinegar Rinse
(detangled with the Denman Brush)
Recently, I decided to get “back to basics” and start washing my hair more often.  I don’t want to use shampoo everytime so I sometimes co-wash and then follow that with a vinegar rinse.  At first, I kept getting the same blah response.  Finally, by accident I think, I poured more vinegar into the container than usual.  Then, I filled it the rest of the way with water from the shower head like I always do.  I could tell right away that something was different.  I could feel the conditioner slipping down my strands.  It was actually removing all of the extra and giving me a clean feeling without leaving my hair stripped.  I left it in for a few minutes before doing a lukewarm rinse.  When I got out, I noticed how soft and fluffy my hair felt. 

I honestly couldn’t believe how good my hair looked.  I didn’t even want to put anything else in it because I was afraid to mess it up.  Now, whenever I do an Apple Cider Vinegar Rinse, I always make sure that I’m using enough vinegar.  I always eyeball it but I would say it’s at least a 1/4 cup (at the bottom of a tall water bottle) and then I fill it to the top with regular water.  I’m so glad I decided to try it again.  It definitely works for me…finally.

The Puff-My New Favorite Style

Wash n’ Go Puff Using
Suave Naturals Coconut Conditioner
and Eco Styler (Argan Oil) Gel

I remember looking through tons of photos and videos of natural hairstyles while I was transitioning.  I was always impressed with how big and fluffy natural hair can get. 

Now, nearly two years later (since the BC), I’m finally starting to see some big hair on my own head.  I just recently noticed that I actually have a decent size puff goin’ on so it’s my go-to style when I want something easy.  I have to be careful though because the headbands I use can be tight at first.  I really wish that I could wear the style everyday but I don’t want to lose my edges or cause any breakage. 


Braid-out Pony Puff
Using a Banana Clip


What I find that works is I’ll wash my hair (usually at night) and then prep it for a braid-out or wash n’ go.  Then, I’ll wear it down the following day.  The day after that, if the style is not as cute as the first day, I’ll put it up in a puff.  When my hair is stretched from braids and twists, I can usually fit my hair into a banana clip that I place horizontally to make a full pony-puff.  After a wash n’ go, I’ll just re-wet my hair and then push it back with a headband until it stops (right at the crown).  I’m definitely looking forward to wearing my hair like this during the summertime. It’s so easy and keeps my hair off of my shoulders.  I just hope that it will also help me get to APL.  Fingers crossed.

My True Hair Length

The other day I was watching a hair length check video by pltbyCormie on YouTube.  She was explaining that if you think that you are not experiencing hair growth, it may be best to start measuring your hair with a tape measure.  This way you end up getting a more accurate look at how long your hair truly is.  Since I’m trying to avoid straightening my hair for awhile, I can never really “see” where my hair is due to shrinkage.  I decided to try it because I have been a little frustrated waiting for APL length hair.  This method not only showed me where my current length is, but also gave me an idea of how much longer until I reach my hair length goals.  It turns out that I am approximately 2″ away from reaching my goal and another 4″ before I reach BSL (bra strap).  I was relieved to finally have something more concrete than just looking in the mirror and waiting for hair growth. 

Measuring from shoulder length to APL;
about 5 to 6 inches
Height and Hair Length
Cormie also mentioned that when we look to others who have already reached their hair length goals, we should try not to compare our hair to theirs.  This is where height comes into play.  Depending on how tall you are, you may have longer or shorter to go before reaching SL (shoulders), APL (arm pits) and BSL (bra strap).  The distance between these points is different for everyone.  If you are shorter in stature then you may be able to reach your goals sooner than someone who is considered quite tall.  I’m 5’6″ and the distance between SL and APL on me is 5 to 6 inches.  I had the unrealistic goal of achieving this length by Dec. of 2010 after only getting to shoulder length in May of 2010.  That’s only 7 months time while my hair most likely only grows 1/2″ per month.  Now I can stop fretting over not reaching this goal already because I can see that I’m on track to reach it by my 2 year natural hair anniversary (May 2011) which is more accurate.  Others who have reached this goal sooner may or may not be shorter than I am.  Now that I have this knowledge, I am looking forward to seeing hair growth in a time frame that is true to me and based on my own hair. 

I Did My Own Big Chop

My hair after 9 months of Transitioning;
Relaxed ends and lots of new growth
I have been doing my own haircuts and trims ever since I graduated from high school.  Still, I wasn’t sure if I could successfully do the “Big Chop” myself.  I transitioned for nine months so it was very easy to see where to make each cut.  I guess I was mostly concerned that I would end up with a fro without the right shape.  I had never worn my hair shorter than ear length so the shape of my hair was going to be pretty important to me. 
For awhile I considered going to my Dad or Brother who are both trained barbers.  I even asked if they would be willing to do it when the time came.  I could tell that my Dad was not going to give me a buzz cut because he’s so used to seeing me with longer hair.  My brother however had done the Chop for a few other ladies who were starting their journey so he was up for it.  Before I made my decision though I decided to check out some videos on YouTube to see how other naturalistas got it done.  It seemed to me that having someone do it at a salon meant getting a little more length taken off than I wanted.  This was because of the shaping that was done after the relaxed pieces were cut away.   That’s when I decided that I would just do it myself because then I would only have myself to blame if I there were any mishaps.  Anyway, I could always have my brother fix it if it came to that. 
My hair the day after the Big Chop
During my transition, I made it a point to cut off a little each month so that I wouldn’t have very much relaxed hair left to part with.  I started out by putting my hair into small sections and cut the first piece right in the front.  No turning back!  My fro was bigger than I expected which was a plus.  The following day, I used some Garnier Fructis Sleek & Shine Leave-in Conditioning Cream, aloe vera gel and shea butter on my wet hair to encourage my first little curls to come into view.  I was so proud of my new hair and how the cut turned out.