Twistout Using Curls Unleashed Curl Defining Creme

I normally do braidouts when I want stretched hair because I know I’ll get consistent results.  The same is not true when I do twistouts.  Sometimes when I take the twists down, my hair is fuzzy and puffy before I even leave the house.  Other times I have trouble getting the twists to stay so the end result looks messy and not as defined as I would like.

This time I decided to use something to give the twists some hold and definition.  I reached for my Eco Styler gel (a staple) but thought maybe I should give the Curls Unleashed Curl Defining Creme a try.  The only other time that I used it was to do a wash n’ go style on wet hair.  I had really good results with it then but since I’ve been back to using my Eco gel I haven’t had much
use for it.

WATCH MY VIDEO ON HOW I DID A WASH N’ GO USING 
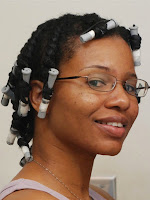

Small Grey Rods are great
for a spiral curl on the ends

For this twistout I started with clean hair.  First I applied my Paul Mitchell The Conditioner leave-in along with the Hollywood Beauty Olive Creme moisturizer.  I wanted to make sure that there was plenty of moisture under the Curls Unleashed product because I remember it having a firm hold.  I applied the Curl Defining Creme on top of the other two products and started doing two strand twists in medium size sections.  At the front I did flat twists on either side of my middle part and for my bangs.  Once all of the twists were done, I used small grey perm rods to spiral curl the ends.  I always use end papers for this step because I don’t want any of the ends to slip off of the rod while I’m sleeping.

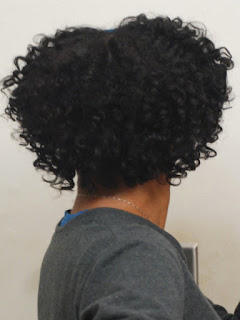
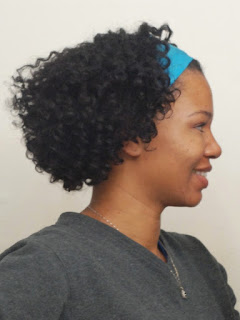
When I woke early the next day, my hair was still damp so I decided to let it air dry completely rather than sit under the dryer.  The resulting twistout was so soft and defined I almost didn’t believe it.  The thing I liked most was that even after fluffing and styling my hair there wasn’t any frizz.  I like big hair and usually lose some definition when I separate and fluff.  I think I’m going to continue to
use this product when I want a nice twistout.  For now here are pics of my first try.

Curly Twistout results with a Satin Scarf for a headband
Before I separated the sections
After fluffing and separating

Natural Style-Flat Twist-Out


While I was transitioning, I learned how to flat twist my hair by watching videos on YouTube.  At first, the technique eluded me and it seemed like I could never get the twists right.  I was always starting each one over and over.  I kept at it and now it is one of my favorite styles.  The only thing I haven’t quite figured out is how to get them to dry faster. 

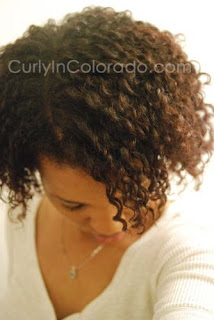
This weekend I decided to do some flat twisting once again for a soft wavy look.  One thing I figured out is that if I twist in rows from the crown and go back towards my nape, I end up with pretty little spirals that fall down around my face. 
Another tip I picked up over at CurlyNikki.com is to secure each flat twist with a bobby pin so that it doesn’t unravel.  Sometimes I use rollers on the ends for a Twist n’ Curl or just leave the ends out for a faster drying time.  

Flat Twists in Rows for soft
Curls that frame the face
After I washed and conditioned my hair, I applied Giovanni Direct Leave-In and a little olive oil to seal the moisture in. Then I used my Aloe Vera/Water/Glycerin spray to re-wet each section before detangling with my Denman brush.  After that, I twisted each section until the hair began to come away from the scalp and pinned the twist down before twisting to the ends.  

The next day, it was a teeny bit damp so I took them down and used a diffuser to dry the hair completely.  That night I twisted them again and used Palmer’s Coconut Oil Formula Replenishing Hair Milk, a little more water and Shea Butter to set the twists for another day.  This time the twists were shiny and the hold lasted a couple more days without re-twisting. This may be my new wintertime style!