My Easy Ponytail Roller Set

I sometimes get discouraged with my hair when I see those little tiny fairy knots on the ends.  Single strand knots (SSKs) can cause a lot of trouble because they tend to catch on hair strands and cause tangles.  Since I won’t be doing any major cuts on my hair this year (fingers crossed) I figured I should try my best to keep the knots to a minimum.

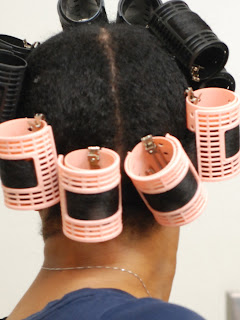
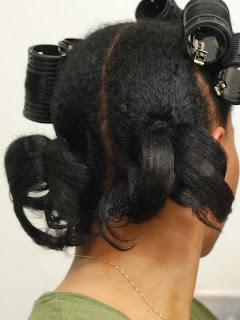
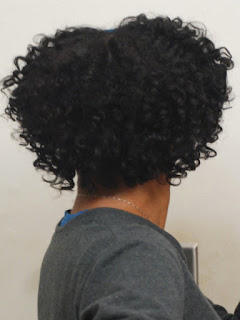
Since I sometimes use heat on my hair I can tell it still has lots of curl and shrinkage but is slightly more manageable than if I had skipped the heat altogether.  I tend to think that this factor has contributed to my success with roller setting lately.  The drying time is still the same but I can sometimes get away with using larger sections than I used to.  I thought maybe I would put my theory to the test by doing a ponytail roller set using only a few ponytail sections.  Instead of doing 4 ponytails down the middle (like a mohawk) and 4 more sections along the sides, I just used 4 large ponytail sections; 2 in front and 2 in back.  I then split each ponytail in half and rolled each section.  I also placed 2 individual rollers for the bangs.  My new method only took 4 ponytails and 10 rollers which is much easier and still gave me great results.

Since my main objective right now is to keep my hair stretched this method will work just fine.  It keeps my ends smooth so I don’t have to worry about them knotting up on me.  Not only that, it also takes a lot less time to get all of the rollers in.  Now that I have this figured out I can use this method to stretch my hair before doing protective styles like buns and up-dos.

THEN:  Ponytail rollerset using more sections
NOW:  Fewer ponytails still worked fine
What I used to get the look:
Creamy Leave-in Conditioner
Heat Protectant serum (to minimize frizz)
Plain Water (to re-wet each section)
Goody Ouchless Ponytail Holders

The Results
Stretched hair with smooth ends

Twistout Using Curls Unleashed Curl Defining Creme

I normally do braidouts when I want stretched hair because I know I’ll get consistent results.  The same is not true when I do twistouts.  Sometimes when I take the twists down, my hair is fuzzy and puffy before I even leave the house.  Other times I have trouble getting the twists to stay so the end result looks messy and not as defined as I would like.

This time I decided to use something to give the twists some hold and definition.  I reached for my Eco Styler gel (a staple) but thought maybe I should give the Curls Unleashed Curl Defining Creme a try.  The only other time that I used it was to do a wash n’ go style on wet hair.  I had really good results with it then but since I’ve been back to using my Eco gel I haven’t had much
use for it.

WATCH MY VIDEO ON HOW I DID A WASH N’ GO USING 


Small Grey Rods are great
for a spiral curl on the ends

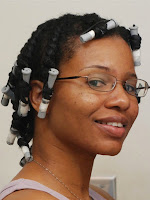
For this twistout I started with clean hair.  First I applied my Paul Mitchell The Conditioner leave-in along with the Hollywood Beauty Olive Creme moisturizer.  I wanted to make sure that there was plenty of moisture under the Curls Unleashed product because I remember it having a firm hold.  I applied the Curl Defining Creme on top of the other two products and started doing two strand twists in medium size sections.  At the front I did flat twists on either side of my middle part and for my bangs.  Once all of the twists were done, I used small grey perm rods to spiral curl the ends.  I always use end papers for this step because I don’t want any of the ends to slip off of the rod while I’m sleeping.

When I woke early the next day, my hair was still damp so I decided to let it air dry completely rather than sit under the dryer.  The resulting twistout was so soft and defined I almost didn’t believe it.  The thing I liked most was that even after fluffing and styling my hair there wasn’t any frizz.  I like big hair and usually lose some definition when I separate and fluff.  I think I’m going to continue to
use this product when I want a nice twistout.  For now here are pics of my first try.

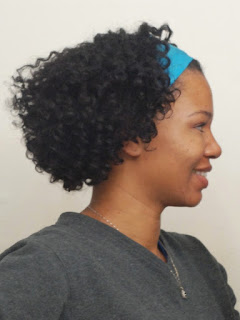
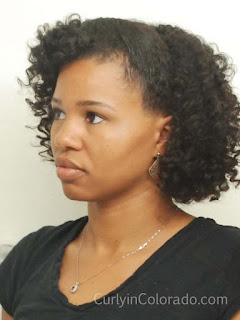
Curly Twistout results with a Satin Scarf for a headband
Before I separated the sections
After fluffing and separating

Re-Visiting My Caruso Steam Rollers

Using Caruso Steam Rollers on
my Straight Natural Hair

I recently wore my hair straight a few times and decided that rollers were the only thing that really gave me the curls I desired.  Overnight I used my Satin Rollers which I originally picked up at Walmart.  Sometimes though, I went to sleep protecting my hair only with a satin bonnet and woke up with hair that was just blah.  It was then that I remembered the Caruso Roller set that I practically begged my husband for over a year ago.  When I first got my Caruso, I remember that it was a little awkward working with the steam and rollers.  I’ve used it several times since then and it is a lot easier to use now.

How I use the Caruso Steam Rollers

Since I’ve always used it on hair that was straightened or previously stretched with rollers, I used to worry about reversion.  I think the only time this actually happened is when I left the rollers on the steam base way too long.  Soggy rollers on natural hair = reversion.   For this reason, I only place the rollers onto the steam base for seven seconds before promptly rolling the hair.  I also make sure that my end paper is already wrapped around the ends of the section of hair I’m working with.

The steam base
The Results
soft curls with no reversion

Another factor is there is always the possibility for frizz when using the rollers because of the added steam.  Using end papers helps to keep my ends smooth.  A light serum or coconut oil also helps to combat frizz.  The last thing I do is leave the rollers in for about 30 to 40 minutes to ensure the hair is completely dry before taking the rollers down.

In my opinion, the best way to style the curls is to use your fingers because brushing or combing will just result in poof (and we don’t want poof).  Using the Caruso Rollers can be tricky at first but they are a great alternative to styling the hair with direct heat.

Braid Out Using Eco Styler Custard

Corkscrew Braidout using
DIY Eco Styler Custard

When I discovered how well my little recipe for Eco Styler Custard worked for my wash n’ go, I never really thought of using it any other way.  This was until I recently revisited my Corkscrew Braidout method for an easy no heat style.  That’s when I decided it was time to put the custard to the test.

Normally when I do the braidout I start with stretched hair so that I’ll have more length and bounce.  This means pulling my hair back and letting it airdry for one whole day before starting the braids.  I just didn’t want to be bothered with all that this time so I did the style on damp hair right after I washed, conditioned and detangled.

I pretty much followed the same Corkscrew Braidout method I used in the video (link below).  However, this time I decided to use Paul Mitchell’s The Conditioner for my leave-in.  Then I applied the custard to each section of my hair before braiding and curling the ends.  I didn’t worry about sealing my hair with oil because the custard mixture already has castor, coconut and grapeseed oil in it.  I also switched to smaller grey perm rods because they give me more of a spiral effect than the medium size rollers.

Check out my YouTube Video for the 

The back

I was really surprised with the results.  My hair was very soft to the touch and moisturized.  I’ve been wearing the style for three whole days without applying any other products.  I haven’t seen any weird product build-up and it still feels pretty soft.  I re-braided a few sections that started to look a little fuzzy at the end of day two.  This was because I just slept on it as is one night.  Otherwise, I’ve just been pineappling my hair at night to help keep the curls in tact.

Small grey rods to roll the ends vs. the larger pink rods
both from Sally’s

I’m really thinking about wearing my hair like this more often.  I get to have the big, curly hair I love while keeping my hair stretched.  The bonus is that my ends stay smooth which means fewer single strand knots.  It’s a win, win if you ask me.


3 days later still lots of curls and softness

The Beauty Supply Warehouse

The Big B.S.S.

Whenever I’m watching YouTube videos and there is a product suggestion I’m always certain I’ll be able to get my hands on it.  I go to Ulta for anything high end or the Big B.S.S. (beauty supply store) in Aurora for everything else.  If you’re in Denver or Aurora, Colorado this place is a must see!

The official name is the Beauty Supply Warehouse and it is located near the intersection of 6th and Potomac just off highway 225.  It used to be the old Skate City from my younger days but is now home to all things hair.  This place doesn’t just carry a lot of different brands but in most cases they have the complete line.  Items from Palmer’s, Mane n’ Tail, Mizani, Hawaiian Silky, Aphogee, IC Fantasia and many more.  I’m not kiddin’.  The first time I went in there I didn’t even know what to do with myself.  Sadly, there are a lot of products there that contain silicone, mineral oils and petroleum.  You know the products I’m talking about; the ones that say they’re for ethnic hair.  Still, I love the selection of Annie’s rollers, hair accessories, satin head coverings and synthetic hair.  Yes, I said hair!  If you are looking for half wigs, lacefronts or hair for braiding you should definitely stop in.  (Even if you just want to get a look at a product before buying online.)

Aisles and Aisles of Hair Products!

There is also a salon inside and usually a vendor or two.  I haven’t looked into having any hair or nail services done there because I’m a DIYer to the core.  The stylists and nail artists always seem to be pretty busy though.

Rollers and Kanekalon Braiding Hair

When I stop in I usually grab my favorite shampoo by Elasta QP, rollers, Olive Creme Moisturizer by Hollywood Beauty and my Cholesterol conditioner.  I also like the fact that they carry a wider selection of the Organic Root Stimulator (ORS) products and the ECO Styler gels.   If I finally get my courage up I may stop back in soon for a half wig or maybe just a drawstring pony.  Last I checked the 100% Kanekalon braiding hair was under $4 (USD) per pack!  Hmmm. . . now where did I see that braiding tutorial?