New Year, New Trim


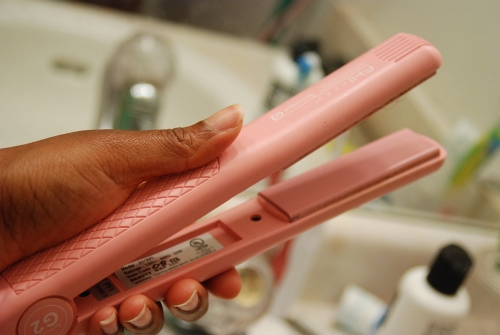
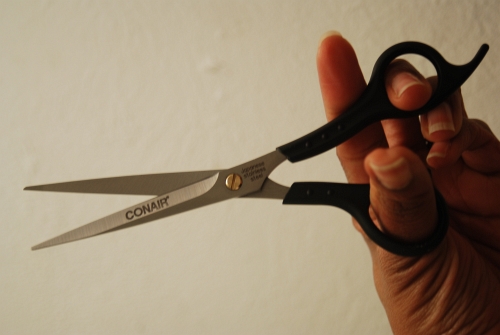
My new Stainless Steel Sheers by Conair
I was looking at my hair for the past few months and noticing that my curl pattern had gotten looser.  I knew that henna can have this effect so I added amla powder to my last few applications to prevent this from happening any further.  After wearing my hair straight twice in December, I was pretty sure that I was experiencing some heat damage.  My hair texture is thinner in the front so it always happens there first.  The rest of my hair was still curly but not as thick as before.  After using my Aubrey Organics GPB conditioner for a couple of light protein treatments, I knew that my hair, although it looked better, still needed a trim. 


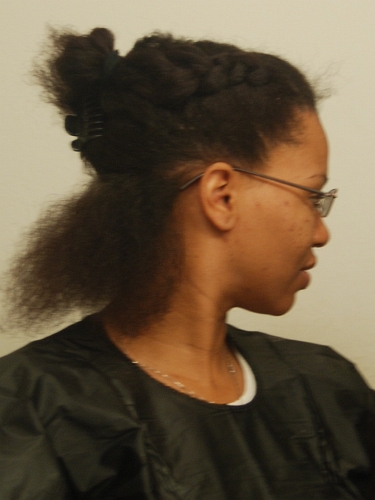
My stretched hair just before
trimming the first section


I was due for a trim this month anyway so I figured why not invest in some new sheers.  I bought the stainless steel hair sheers by Conair.  I was surprised to find them in a kit that also came with a cape…COOL!  Instead of flat ironing my hair again, I decided to do the trim on stretched hair.  This method showed me that it is possible to do a trim without using heat.  I decided to go for it and take off a little more than the usual 1/8″ to 1/4″.  I cut a full 1/2″ off of each section!  That is a whole months’ growth for me but it was definitely worth it. 
Front View
Thicker, Curlier Hair with Shape
The result…MY CURLS ARE BACK!  I’m so excited because my hair has not been this thick and curly for so long.  The bangs are still pretty loose but I’m okay with that.  The other thing that decided to join the party is my crazy shrinkage.  My hair looks really short since the trim even though it’s still past my shoulders in the back.  This is exciting because I didn’t actually have to cut very much in order to get back where I wanted to be.  I’m still serious about achieving great lengths with my hair this year.  Now, with the trim, I have the healthy ends I need to start things off right.  


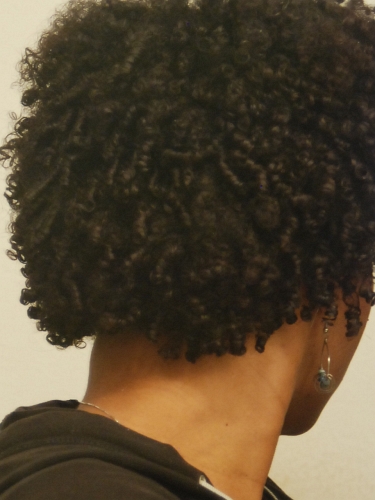
Back View
Looks short but it’s still
past shoulder length


Choosing a Ceramic Flat Iron

My FHI Ceramic Flat Iron
When my first flat iron quit working after only one year of use, I decided that I would definitely look into buying something of better quality the next go ’round.  Little did I know that it would be 7 months before I would finally purchase a new one.  Instead of running out and replacing it right away, I decided to take my time and do some research.  One of the first things I did was start looking into styling options that didn’t require the use of heat.  This started me on my Natural Hair journey which meant that the flat iron of my dreams would have to be able to straighten my natural hair texture, kinks and all.
I looked at Consumer Reports on the subject and found tons of info on the different types of flat irons.  There are a lot of heat styling tools that are ceramic now but the real question is, how ceramic are they?  It turns out that my previous joke of a flat iron was only ceramic coated which would explain the $40 USD price tag.  The material started peeling and would catch my hair.  This exposed the metal plates underneath and caused lots of breakage.  However, professional tools that used full ceramic plates were priced way more than I could afford and were very fragile.  One drop and crack goes the flat iron.  I later read that the mid-range variety ($80-$150) used plates that have multiple layers of ceramic coating and sometimes even added tourmaline. 

 It is the tourmaline that helps the iron produce more negative ions.  No, this is not chemistry class folks, we’re talkin’ hair here!  Apparently the more negative ions the better the heat.  Of course, using direct heat on the hair is never considered a good thing but I found out that there are different types of heat.  This information explained how some flat irons give excellent results and also cause less damage while others burn the hair to a crisp.

Of all the brands out there I finally narrowed it down to the FHI Technique G2.  I found the pink version on sale at Ulta for $79 but still see it at Target for ten dollars more.  It definitely puts my old iron to shame but the sucker gets hot so I have to be extremely careful with it.  I like that it has a beveled edge which makes it really easy to do flips and curls.  If I could do it all over again I would hold out for the FHI Platform which has a dial so you can adjust the heat setting.  Maybe one day…a girl can dream, right?  

**Check out this article for more info on choosing a quality Flat Iron**

Eco Styler Wash n’ Go Trials

A few months ago I learned more about Aloe Vera and how it can help restore the natural pH balance of my hair.  This had me wondering what would happen if I added Aloe Vera juice to one of my staple products Eco Styler gel

I’ve been using this gel for my wash n’ go styles and whenever I need to slick down my edges.  However, if I forget to apply enough moisturizing products underneath it, my hair ends up a little on the crunchy side.  So, I figured why not add aloe vera and see if that makes a difference since it will help bring the pH of the gel down (hopefully).  I don’t have pH tester strips yet so I can’t verify what pH I ended up with but the results were good.  The product, as always, helped define my curls.  Upon drying though; dry crunchy hair.  What gives?! 

I’ve been learning in the past few months that it’s not just the pH that is important but also the ingredients.  This little experiment made me realize that it may be the glycerin in the product that always gives me the “Ramen Noodle effect” which is why I always need use oil and conditioner underneath.  Also, living in a dry climate where there is no humidity present can also add to the drying (not moisturizing) effect of the glycerin.  For now, I’m avoiding the Eco Styler or using it sparingly until I can figure out the combination that works for me.


Before applying the aloe/gel mix


My hair with Aloe/ Gel mixture
applied to one section

Aloe Vera for pH Balance–Spray Leave-in Recipe

After watching KimmayTube’s videos on pH Balance, I realized the reason why Aloe Vera juice or gel has always been such a huge part of my regimen.  When I did my Big Chop in May of 2009, it was one of the first things I used on my hair and my family has been using it ever since.  It wasn’t until I watched the videos that I actually knew how it worked.  Basically our hair’s natural pH is a 4 or 4.5 on the chart which is the same value given for Aloe Vera juice or gel (different brands may vary).  Things like conditioner, shampoo and even water have a pH of 6 or 7.  This change in pH balance opens up the cuticles along the hair shaft which can result in frizzy, puffy hair.  Using the Aloe Vera is a way to bring the hair back to its’ proper pH making it easier to detangle and style.


KimmayTube is also known for her Leave-in conditioner recipe which incorporate’s Aloe Vera juice as the balancing ingredient.  I’ve tried it and liked the results.  For me and my family though I prefer a spray leave-in that can be used daily.  For this I use the following:


Aloe Vera Spray Leave-In

1 part Aloe Vera Gel or Juice (Lily of the Desert brand)
1 part Water
5-6 drops Rosemary essential oil (natural preservative)
1 to 2 squirts Giovanni Direct Leave-In

Combine ingredients in a spray bottle and shake vigorously until conditioner dissolves.  The conditioner will continue to dissolve over the next few hours.  Use as a moisturizing leave-in or re-wetting spray.

Some of the ways I use it:
  • Set my braidouts/twistouts
  • re-wet my kids’ curly hair before combing
  • detangling my husband’s long hair
  • re-wetting/moisturizing my wash n’ go
Most recently I found that it works when re-activating the Kinky Curly Curling Custard on my son’s hair for great 2nd day hair with the product.  I like this mix because we’re getting the benefit of the Aloe and Conditioner in one easy to use spray.
*Be sure to stop by KimmayTube’s channel on YouTube to find out more about the structure of hair.

Reshma Henna Review

I recently found Reshma Henna at a local Indian grocery store. After hearing about it online, I thought I would try it out. For 200 grams the cost was only three dollars. I figured if it worked I was definitely going back to buy more. Well, it not only worked, it also rinsed out a lot easier than the henna I used in the past.

I combined 100 grams Reshma Henna with about 50 grams Amla powder which is a great conditioner. I also had a little Moroccan Henna leftover from my Hennasooq.com order so I figured I would use the rest. The resulting color definitely covered my stubborn greys but was still very burgundy red. Indoors it still looks dark but you can really see the red tone in the sun. I was hoping for a different result because amla is known for darkening but, oh well.

On other occasions I combined Indigo with my Henna for a brunette color. Somehow I was still ending up with a more reddish auburn. I may end up going black by applying the Indigo to my hair after I’ve rinsed the henna. I’ve heard that this 2 step process will also give the best gray coverage. Either that or I’ll give the henna/indigo mix one more go but this time using more indigo.