Ron Paul Campaigns in Denver

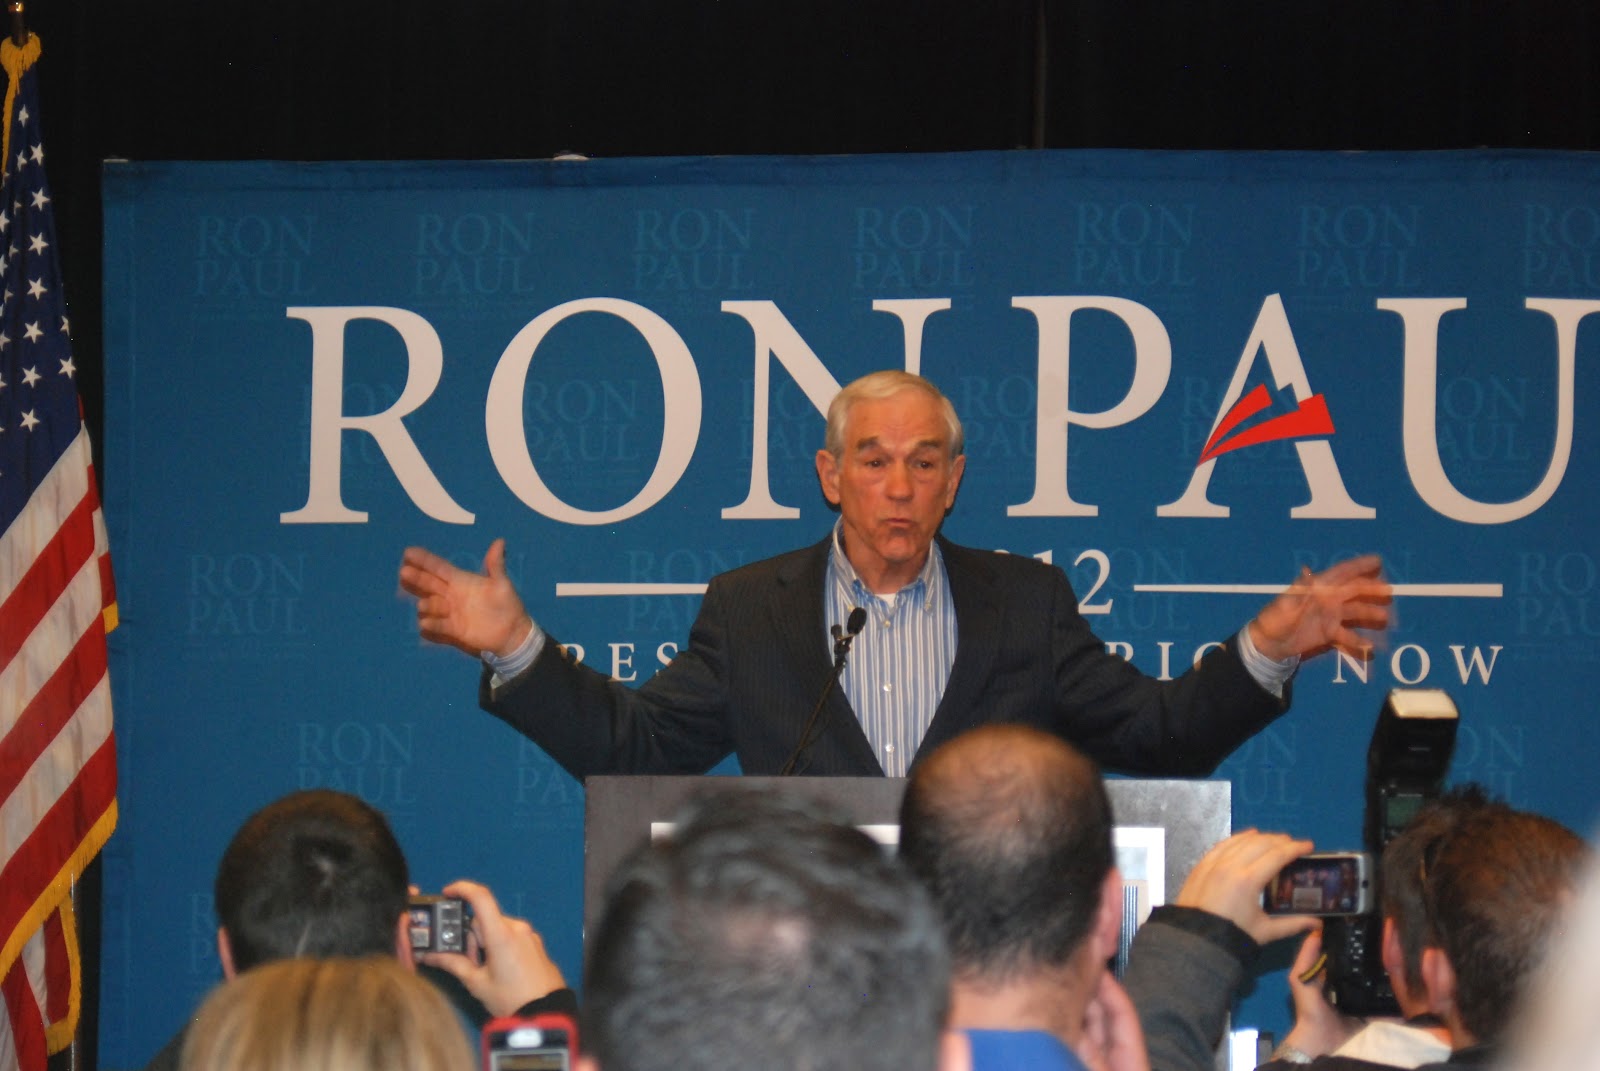
Congressman Ron Paul
at the Renaissance Hotel in Denver

My husband and I have been longtime Ron Paul supporters.  When we found out that he would be in Denver this week, my husband made plans to go and hear him speak.  He made a stop here because of  the upcoming Colorado Caucus next week.  According to my husband, who is also a Precinct Captain, there were about 1200 people in attendance at the Renaissance Hotel on Quebec St. in Denver.   Afterwards, Congressman Paul was headed for another event in Colorado Springs.

Of course my Hubby picked up lots of bumper stickers and signage for the canvasing he and his Co-Captain will be doing later this week.  He also brought home something that I thought was really interesting.  It was the Ron Paul Family Cook Book.  Looking through it was pretty neat.  It included lots of pictures of Ron Paul with his own family and even his military portrait.  I’m looking forward to trying out some of the recipes from the book in the coming months.

My Husband
Supporting Presidential
Candidate Ron Paul

After the event, my husband headed over to the local Ron Paul office to volunteer for a few hours on the phones.

The Beauty Supply Warehouse

The Big B.S.S.

Whenever I’m watching YouTube videos and there is a product suggestion I’m always certain I’ll be able to get my hands on it.  I go to Ulta for anything high end or the Big B.S.S. (beauty supply store) in Aurora for everything else.  If you’re in Denver or Aurora, Colorado this place is a must see!

The official name is the Beauty Supply Warehouse and it is located near the intersection of 6th and Potomac just off highway 225.  It used to be the old Skate City from my younger days but is now home to all things hair.  This place doesn’t just carry a lot of different brands but in most cases they have the complete line.  Items from Palmer’s, Mane n’ Tail, Mizani, Hawaiian Silky, Aphogee, IC Fantasia and many more.  I’m not kiddin’.  The first time I went in there I didn’t even know what to do with myself.  Sadly, there are a lot of products there that contain silicone, mineral oils and petroleum.  You know the products I’m talking about; the ones that say they’re for ethnic hair.  Still, I love the selection of Annie’s rollers, hair accessories, satin head coverings and synthetic hair.  Yes, I said hair!  If you are looking for half wigs, lacefronts or hair for braiding you should definitely stop in.  (Even if you just want to get a look at a product before buying online.)

Aisles and Aisles of Hair Products!

There is also a salon inside and usually a vendor or two.  I haven’t looked into having any hair or nail services done there because I’m a DIYer to the core.  The stylists and nail artists always seem to be pretty busy though.

Rollers and Kanekalon Braiding Hair

When I stop in I usually grab my favorite shampoo by Elasta QP, rollers, Olive Creme Moisturizer by Hollywood Beauty and my Cholesterol conditioner.  I also like the fact that they carry a wider selection of the Organic Root Stimulator (ORS) products and the ECO Styler gels.   If I finally get my courage up I may stop back in soon for a half wig or maybe just a drawstring pony.  Last I checked the 100% Kanekalon braiding hair was under $4 (USD) per pack!  Hmmm. . . now where did I see that braiding tutorial?

Protecting Your Hair at Night

Satin Bonnet
for when I’m wearing rollers and
curly braid outs

I’ve been writing lately about Protective Hairstyles which can help with length retention.  Yet another way to protect the hair is by wrapping it up at night.  This may sound like a no brainer to some but there is a lot of benefit for the hair by doing this one thing.   This practice can be a huge help when trying to reach your hair length goals.

I  recently re-read a bit of Wanakee Pugh’s “Practical Guide to Haircare” and something stood out to me.  She stated that even if your hair is too short to be pulled back into a protective style, you can still benefit from wrapping your hair at night.  This reminded me of the beginning of my Natural Hair journey because I did this faithfully every night.  My hair was maybe only 1 1/2 inches long at the time but I kept it wrapped up in my satin scarves when I went to sleep.  Now that my hair is longer I can tell a huge difference in my hair when I go to bed without covering it up.  I wake up to tangles and sometimes dryness.  I agree that it is not the cutest look going but it works.

I mentioned my satin scarves (I have a nice little collection) but you can also use a satin bonnet.  Satin is a man made material that is easy to wash and can be long lasting.  This is highly recommended as far as material choice because it does not draw moisture away from the hair and is smooth so it won’t disturb it very much while you sleep.  When I wear rollers to bed I usually reach for my satin bonnet.  Otherwise, I have scarves in a variety of sizes for when I wear braids, twists and protective styles to bed.  Here’s a few pics of how I wrap my hair.

Pineapple for the Corkscrew Braid Out
with my edges protected

Air drying while smoothing my edges 

Large Satin Scarf to protect my
 Roller Set from the rain

Satin Bonnets and Scarves from
the local BSS

Protective Style: Flat Twist UpDo

I’m finally embracing the idea of protective styling to help me retain more length.  This concept has been so hard for me to grasp because I absolutely love wearing my hair out.  The more time I spend over at K.I.S.S. hair forum the more I see that during the week (Monday thru Friday) there really isn’t any need to wear my hair down.  I’m usually shuttling the kids to school, exercising and running errands which does not require a glam look.  Still, when I want to look somewhat put together I just throw my hair up into two large flat twists and I’m good.

Before, I discovered this look I was always wearing two french braids (under hand braiding) or two cornrows (over hand braiding).  Sometimes though I think the braids made me look a little juvenile so for this reason I started wearing the twists
more often.

Flat Twists secured
with a Barret

My process is pretty simple.  I discovered that the flat twists have lots more volume when I allow my hair to air dry first.  Usually after my wash day routine, I apply my leave-ins and just pull my hair back into a braided bun for a whole day until it is mostly dry.  Then I take the hair down so I can apply my moisturizer and seal with grapeseed or olive oil.  After this step, I separate my hair into two large sections, parting down the middle and pin one side up with a clip to keep it out of the way.  I lightly comb out the other side with a wide tooth comb and begin flat twisting from the front of my head all they way to the nape.  I found that the twist looks best when I grab smaller sections for each turn.  After twisting all the way down I let the twist sit for a few minutes because it will gradually loosen a bit and look fuller.  I repeat on the other section.  Once both flat twists have “grown,” I take the tail ends and twist them around each other.  I then tuck them at the base of the twists with a bobby pin or barrette.  If I want bangs I just take a small section at the front and do three small two-strand twists.  Then I swoop them and secure the bangs into one of the twists.  If I see any loose points along either twist I just use bobby pins to tighten things up.

I used three small two-strand twists
for a side swooped bang

I enjoy wearing this style because it has the potential to look really glam with a little makeup and some earrings.  This is also an easy style to take down so that I can moisturize and seal my hair whenever it is starting to feel dry.  The best thing is knowing that I’m taking care of my hair by simply keeping it tucked away.