Fighting Hair Breakage with Olive Oil and Coconut Oil

curlyincolorado.com fight hair breakage olive oil coconut oilIf you follow my Instagram page@mitchellzee, then you already know that I have been experiencing some breakage lately.  I have already taken steps to help strengthen my hair with protein.  For this I went back to my trusty Aphogee 2 Minute Reconstructor but I also picked up some Cantu Shea Butter Leave-in.  Both products claim to help strengthen damaged hair so I figured they may be what my hair needs right now.

When I started examining my hair regimen over the past couple of months though I noticed that I had been shampooing more often.  Now, I’m not afraid to cleanse my hair with shampoo because I’ll sometimes use an Apple Cider Vinegar rinse afterwards to help restore my hair’s pH level.  Recently though I was skipping this step altogether.   I also started using a cheapie Suave shampoo with sulfates and silicones instead of my staple, Elasta QP’s Creme Conditioning shampoo.  I like using shampoo once per week because my scalp does not feel as clean with other products.  That’s why I decided I should start using oils to give my hair extra moisture and protection from the drying effects of the shampoo.
First, I used the Aphogee 2 Minute Reconstructor in the shower for a few minutes after cleansing my hair with Suave’s Almond Shea Butter shampoo.   The Aphogee products are protein based so I used this to help with breakage and split end prevention.  I hadn’t used it in a while but I remembered having the best results on clean hair.  After that I did a moisturizing deep conditioning treatment using coconut oil and Tresemme Naturals conditioner.  I sat under the dryer with a plastic cap for about thirty minutes.  Aftwerwards, my hair felt like buttah!  It was so much easier to detangle than before so this was definitely a winner.  

curlyincolorado.com fight hair breakage olive oil coconut oil
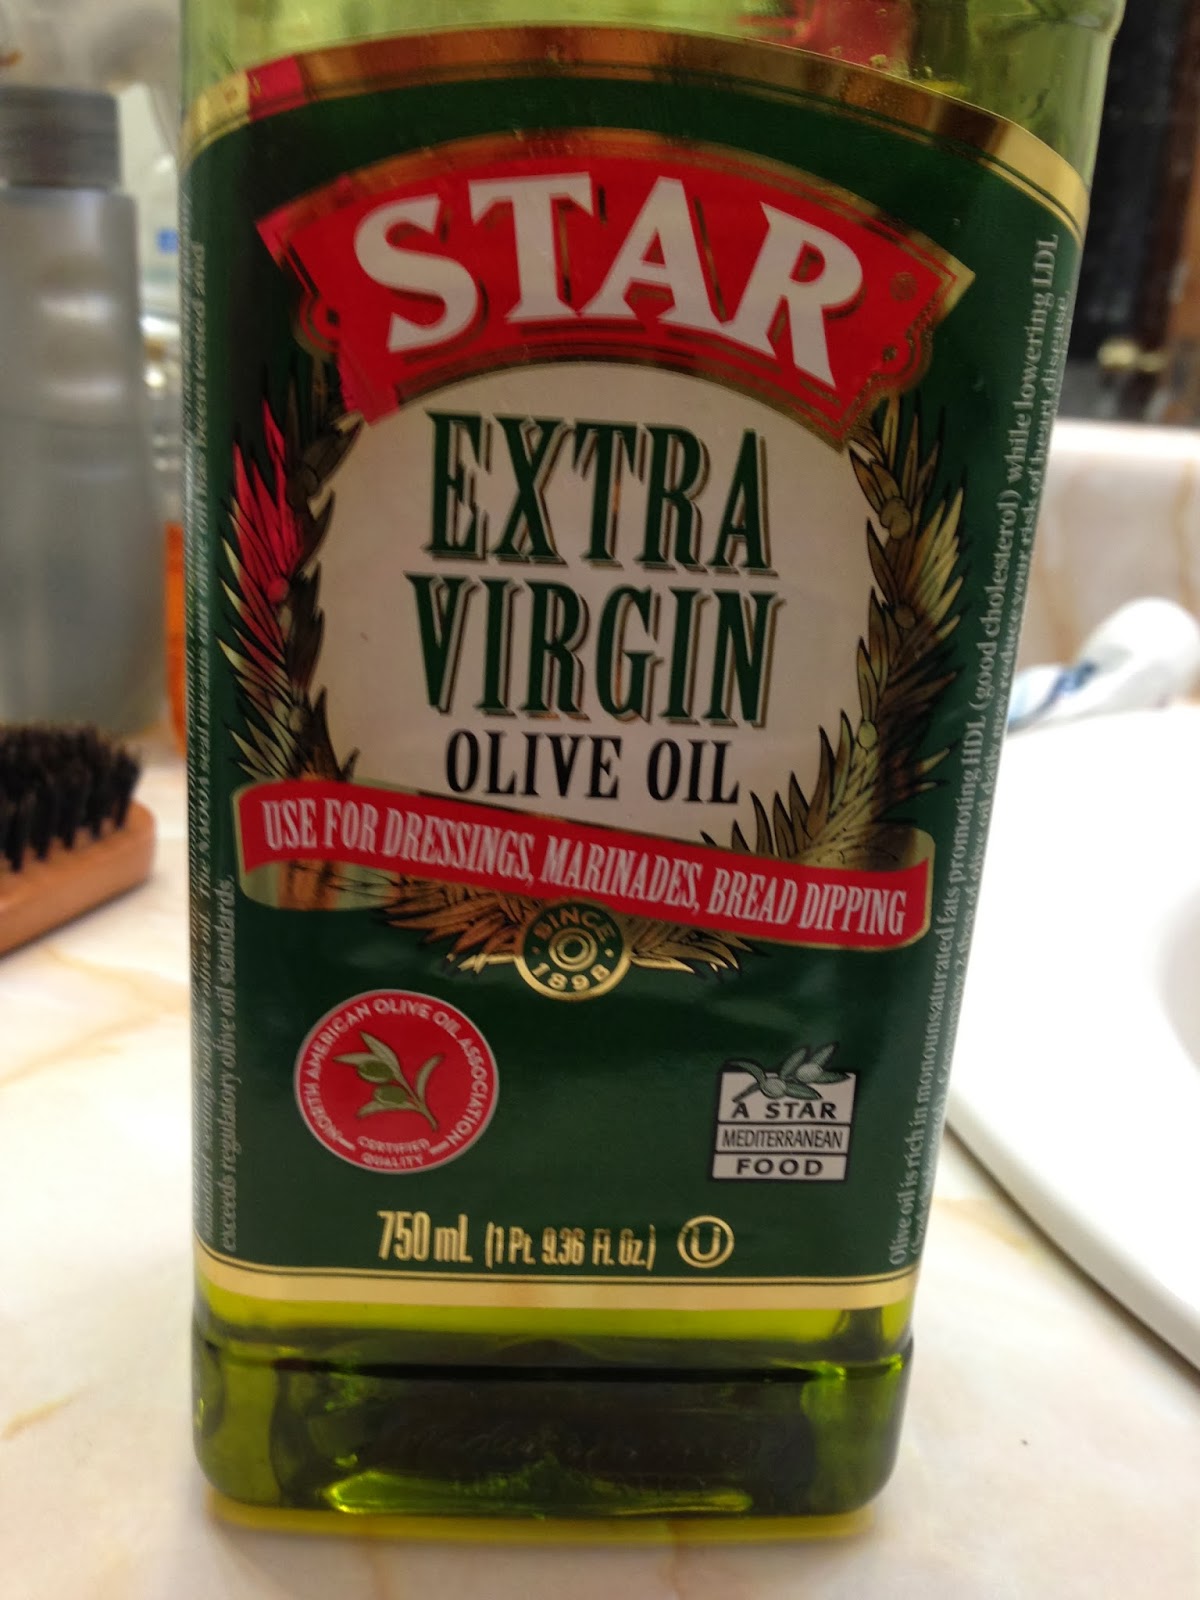
I’m using Olive and Coconut
Oils for moisture and conditioning

The following week I tried a pre-shampoo (pre-poo) treatment with olive oil.  This was just to ensure that my shampoo wouldn’t strip my hair during the washing process.  I also applied the oil to my scalp and massaged it in thouroughly to treat any dryness or flaking.  After using shampoo and conditioner I used the olive oil again with the Cantu Shea Butter leave-in and put my hair into plaits.  The resulting braid out was fab-u-lous!

My hair this week is feeling much more pliable and moisturized than before.  Right now I’m looking for a new shampoo that is not as drying.  Otherwise, I will continue to use the coconut and olive oils consistently over the next few months.   I really want to start retaining more of my length this year.  I can see that the oils will play a big part in helping me achieve my goals.
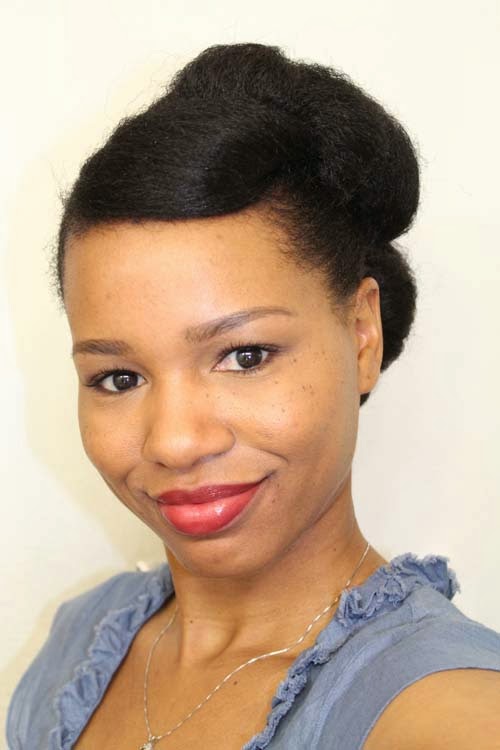
Easy Up-Do on Stretched Natural Hair

www.Curlyincolorado.com stretched natural hair style
Easy Up-Do on Stretched Natural Hair

There are all sorts of ways to stretch natural hair and I’ve pretty much tried them all.  Thing is, I am always stuck trying to figure out how to style my hair once it’s stretched.  Enter the Up-Do.  After watching plenty of videos on the subject, I can finally say I’ve got a few tricks up my sleeve.

The Crown Braid style that I demonstrated in my french braiding video is a favorite of mine.  It can last several days if I keep it wrapped up at night.  Lately though I wanted something with a little more pizazz and found this look that was also really easy
to do.

This is similar to the look that Teyonah Parris rocked on the red carpet at the SAG awards last year.  I like that you can change this into a mohawk style or go with a simple bun.  This is truly where stretched natural hair shines because the texture gives fullness to the style.

Here’s a pictorial of how I achieved this style.

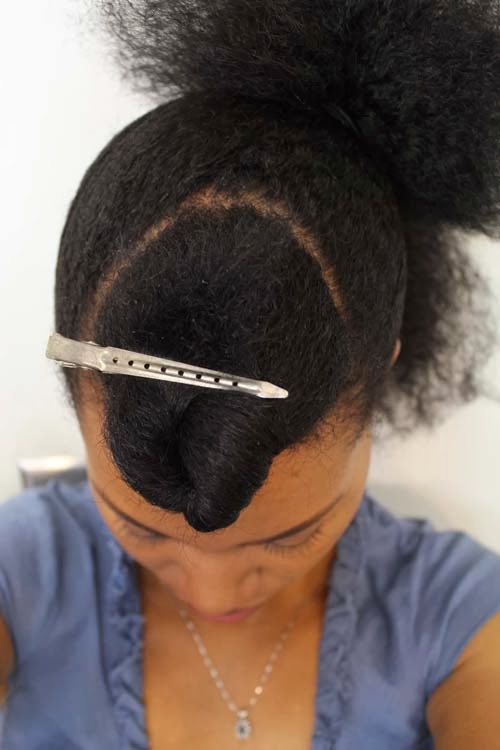
I first sectioned off my bangs with a u-shape part

curlyincolorado.com stretched natural hair style

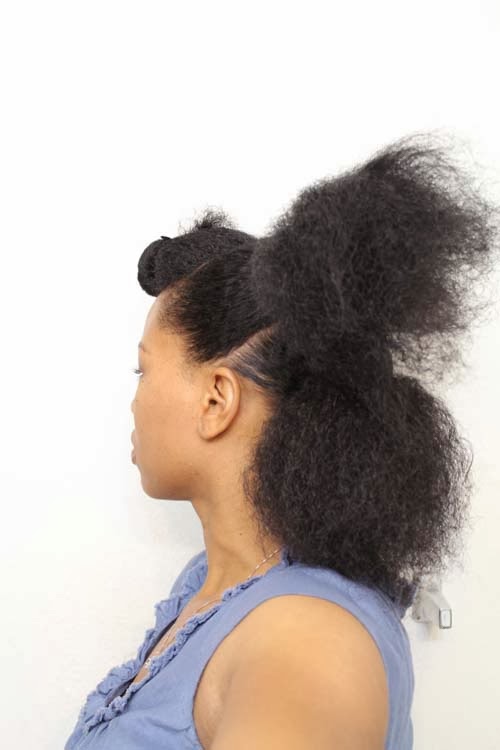
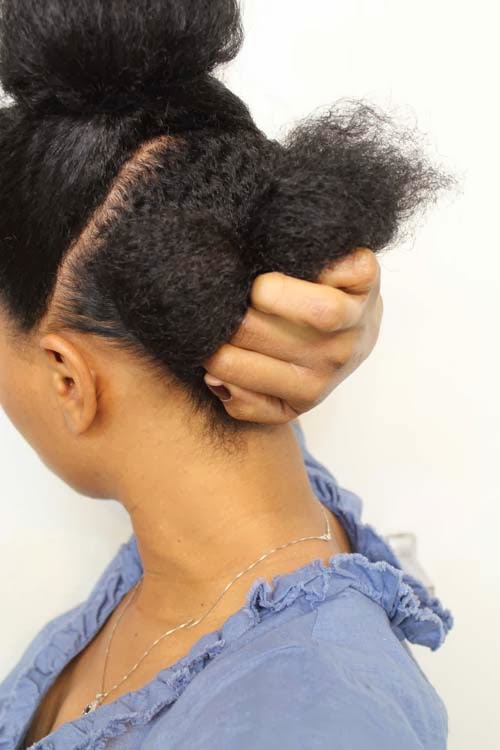
Then I split the rest of my hair into two sections parting from ear to ear.  Next, I pulled each section into ponytails using elastic bands to secure.  

curlyincolorado.com stretched natural hair style

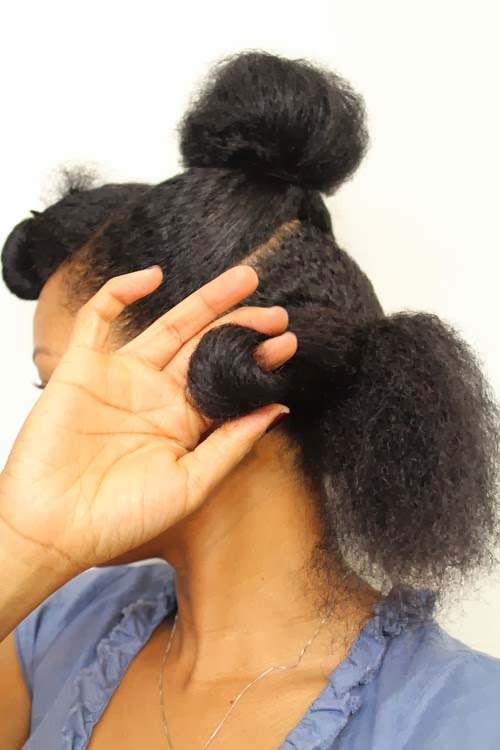
Now it’s time for some bobby pins.  I just took the bottom ponytail and split the hair into three.  I finger rolled my hair like I was pincurling it and bobby pinned the hair down towards the base of the elastic. 

curlyincolorado.com stretched natural hair style
Finger Rolling

curlyincolorado.com stretched natural hair style
Roll down toward the base of the elastic

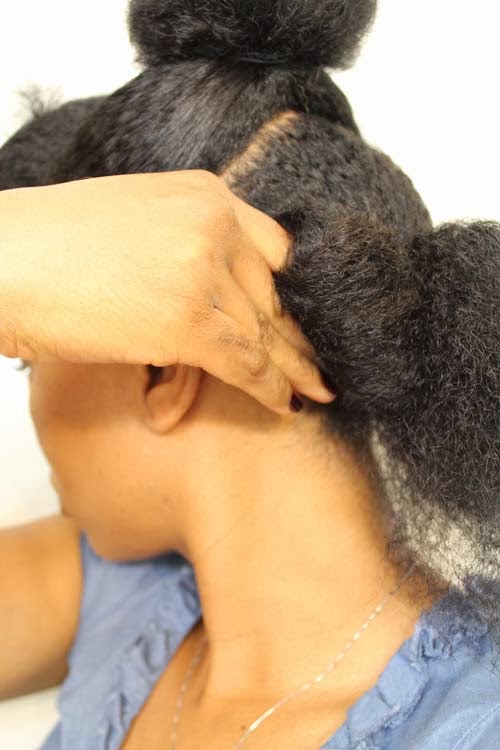
curlyincolorado.com stretched natural hair style
Pin Down with a Bobby Pin

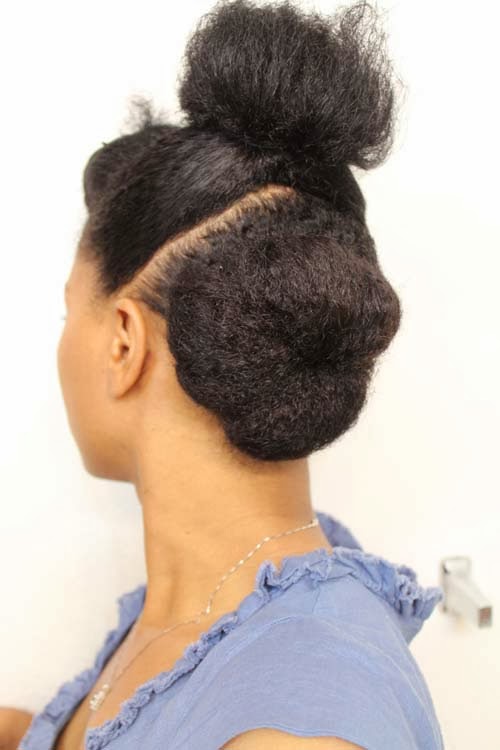
 I took the other two sections and did the same thing, pinning them around the sides of the elastic for a full bun effect.

curlyincolorado.com stretched natural hair style
This ponytail was split into three sections

I did the same rolling and pinning on the second/top ponytail and then moved on to the bangs. 

curlyincolorado.com stretched natural hair style

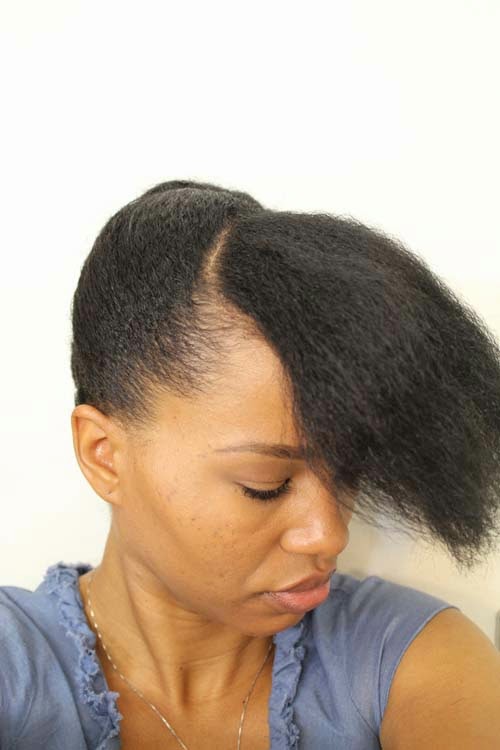
 The bangs can be pinned back into a pompadour or swooped forward.  This is usually where I freestyle a bit until I get the hair how I want it.  

curlyincolorado.com stretched natural hair style
Swooped bangs

I finished the style by smoothing the sides with a soft bristle brush and there you have it.  So Easy!

curlyincolorado.com stretched natural hair style
The finished look

This Up-Do is too easy to pass up.  Let me know if you give it a try!


Using Coconut Oil on Natural Hair in Colder Weather

Coconut Oil for Natural Hair During Winter ww.CurlyinColorado.com
My braid out results using conditioner and coconut oil

I recently picked up one of my favorite hair products, Extra Virgin Coconut Oil.  I probably haven’t had any on hand in a little over a year.  This went from being my staple to being something that was just okay.  Somehow I stopped wanting to buy multiple bottles of oils and decided my Grapeseed and Castor oils were all I needed.  Lately though I started to consider the fact that something seemed very different about my hair.  This made me think back to some of the things I did or used at the start of my journey.  That’s when I realized that it had been ages since I used coconut oil on my hair.

Coconut oil can have many benefits for the hair.  The one that I was most concerned about was the oil’s ability to moisturize the hair.  This is because it’s made up of tiny molecules that are small enough to penetrate through the cuticle layer.  I picked some up at my local natural grocery store, Sprouts, without another thought.  It wasn’t until I got home that I realized that, in the past, I tried to stay away from coconut oil during the colder months.  Why?  Well, it was because of the fact that the oil had a tendency to solidify at lower temperatures which could lead to hard hair.  This happened to me the first week I started using it again.  I tried it as a sealant after spritzing my hair with leave-in conditioner diluted with plain water.  I did this for a few days in a row before braiding my hair up into two french braids.  When I took my hair down on wash day I noticed that weird, hard feeling.  My ends felt like straw.

After that I figured maybe I would just use it for deep conditioning or hot oil treatments.  Until one night when I decided to use it with my Aussie Moist conditioner for a braid out.  I applied the conditioner to my freshly washed and conditioned hair and then sealed with the coconut oil.  I then took medium sized sections and spritzed with water before smoothing the hair with my denman brush and braided it into plaits.  Let me tell you, my hair was so soft and defined even I couldn’t believe the results!  Just two products and I ended up with a braid out that was photoshoot worthy.  That’s when I realized that the coconut oil worked for me as long as I used it on wet hair without too much product buildup.   Now my hair is back in love with my old bestie and I plan on keeping up with it during the rest of my No Heat Challenge.  Hopefully this will give me an extra moisture boost during these harsh winter months.  

Changing My Hair Routine for the Winter Months

Curly in Colorado Winter Hair Routine
Making changes to my Wash n’ Go routine
for the winter months

This is the time of year where we start to make changes in a lot of ways.  Sometimes the drier weather may call for heavier products for the hair and skin.  This has been the case for me lately as I have had to make adjustments to my hair routine to make up for the lack of moisture.  Normally I’m able to do my wash n’ go style with just two products.  I like to use my favorite leave-in, Paul Mitchell’s The Conditioner with Eco Styler gel (the Argan oil one).  Right around early October I could tell that my usual combo was not working like it did over the summer.  I decided to add a little Castor oil to seal in moisture before applying the gel.  This helped some, but still wasn’t quite what my hair needed.

I started leaving conditioner in my hair that I would normally rinse out.   The Tresseme Naturals conditioners worked great for this but sometimes I used the Aussi Moist conditioner.  Both products were thick, rich and gave lots of slip.  The Aussi Moist even worked as a styler on it’s own and gave me lots of curl definition.  The only thing though with using conditioner only was that I didn’t get as much wear out of the style.  With Eco gel added I could go 4 to 5 days before having to re-do my hair.  With conditioner as my styler, I’m lookin’ at two days tops.

I finally settled on applying a little of the Tresseme conditioner to my hair for a moisture boost.  Then I’ll apply a little bit of the Paul Mitchell leave-in to each section I’m working on.  I seal in the moisture with a quarter size amount of castor oil for each section.  Finally, I re-wet my hair by spritzing water on the sections before applying the gel for hold.  It’s taken me a few weeks to figure this new method out but it seems to be working a lot better for me.  The added moisture makes my hair shrink up more but that’s a good thing so I welcome it.

Learning How to French Braid Natural Hair

french braiding natural hair
French Braids on my Natural Hair

Recently I posted a Youtube video on how I french braid my natural hair.  I have been wearing my hair braided up more often recently as part of my No Heat Challenge.  It has made things a little easier for me because the weather is cooler these days.  My hair can get really big and full so the french braids make it possible for me to get a hat on my head whenever I want.  I also use the braids to protect my hair while I’m sleeping at night so I won’t have to wake up to tangles in the morning.

I posted the video because I wanted to offer a visual to other naturals of how to do french braids.  I see a lot of comments online from people who have never learned how to braid their hair in this way.  I learned the technique from my mother who braided my hair every week when I was younger.  Sometimes she would do a fancy braided style on my hair but later on she just did one or two french braids with a little bang in front.  When I was about ten years old she taught me how to do it on my own hair.  She also taught me how to do the inverted method which was basically the opposite of french braiding.  I was frustrated with it at first because my braids just didn’t look as nice and tight as when she did them.  I eventually got the hang of it though.

CHECK OUT MY VIDEO ON HOW I FRENCH BRAID MY NATURAL HAIR
Having this styling technique in my arsenal made it that much easier when I went natural.  When my hair grew past the TWA stage I knew that I could braid my hair up for a braid out or protective style.  I can see now that I’m also saving money because I’ve never gone to someone else to have them braid it for me.  Hopefully more people will learn the technique so that they’ll have more options when styling natural hair.